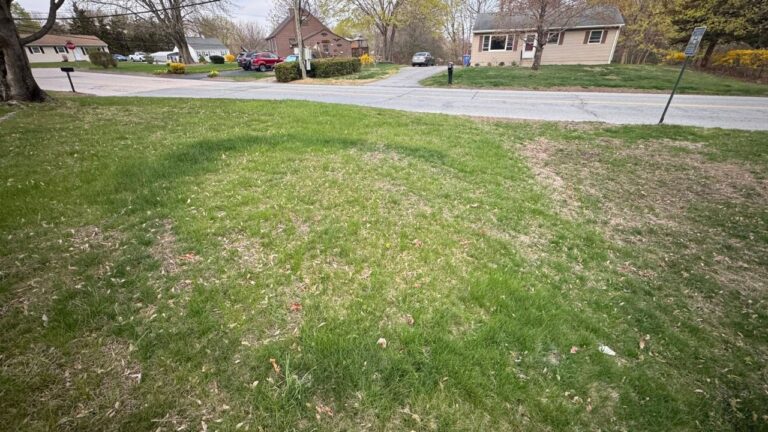
Every spring in Greater Sudbury, once the snow melts and people walk out to look at their lawn for the first time since October, my phone starts ringing with the same question.
“There are these circular dead patches all over my lawn. It looks like something died under the snow. What is it?”
Snow mould. Almost every time.
It’s one of the most common spring lawn problems in Sudbury — and one of the most misunderstood. Some homeowners panic and immediately start planning a full resod. Others ignore it entirely and hope it goes away. Most of the time, the right answer is somewhere in between and a lot less dramatic than either extreme.
I’m Ryan Lingenfelter, owner of Cutting Edge Lawn & Landscaping in Garson, Ontario. I’ve walked lawns across Greater Sudbury every spring since 2020 and I’ve seen snow mould in all its forms — mild cases that resolve on their own and severe cases that needed real intervention. Here’s everything you actually need to know.
What Snow Mould Actually Is
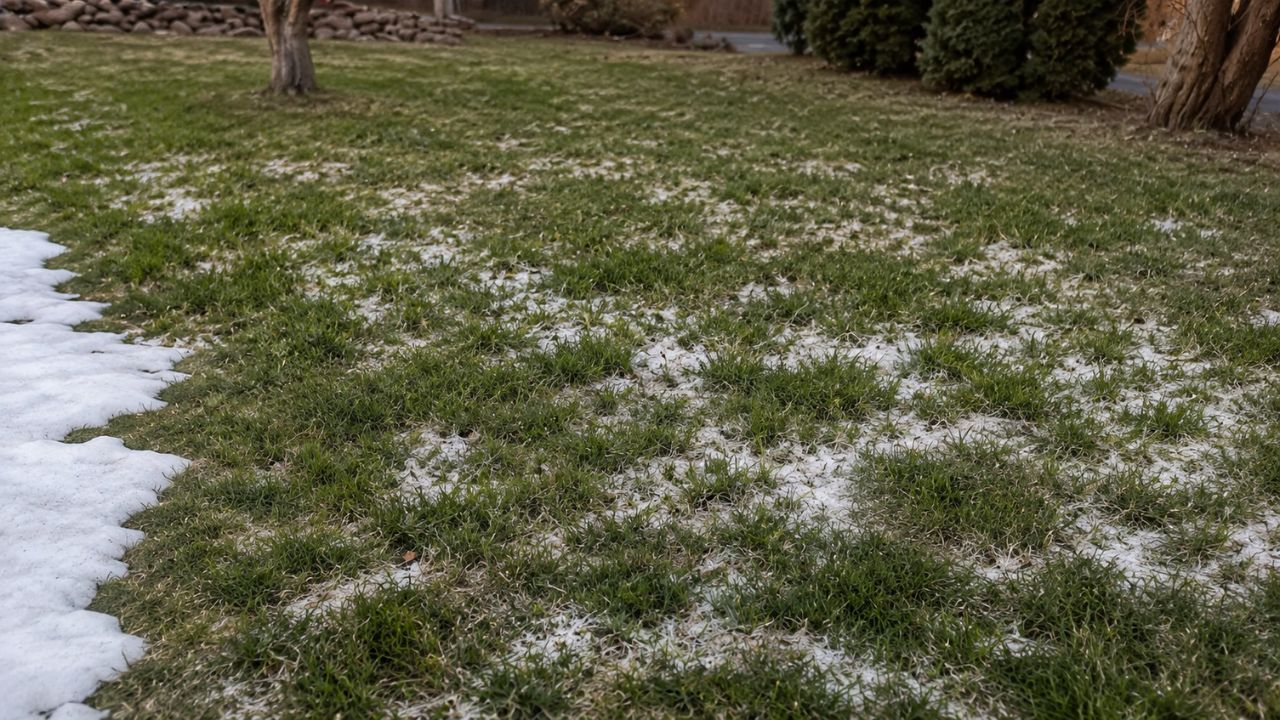
Snow mould is a fungal disease. Specifically, it’s caused by one of two fungi — Microdochium nivale (pink snow mould) or Typhula incarnata and related species (grey snow mould) — that thrive under specific conditions: cool temperatures, high moisture, and reduced oxygen. In other words, exactly the conditions found under a layer of snow sitting on a lawn for five months.
The fungus is present in most Ontario lawns as a normal part of the soil microbiome. It doesn’t cause problems when it’s exposed to air, sunlight, and normal temperature fluctuations. But when snow covers the lawn in early winter and sits there through February, March, and into April — creating a dark, cold, wet, oxygen-limited environment for months — the fungus activates and spreads through the grass.
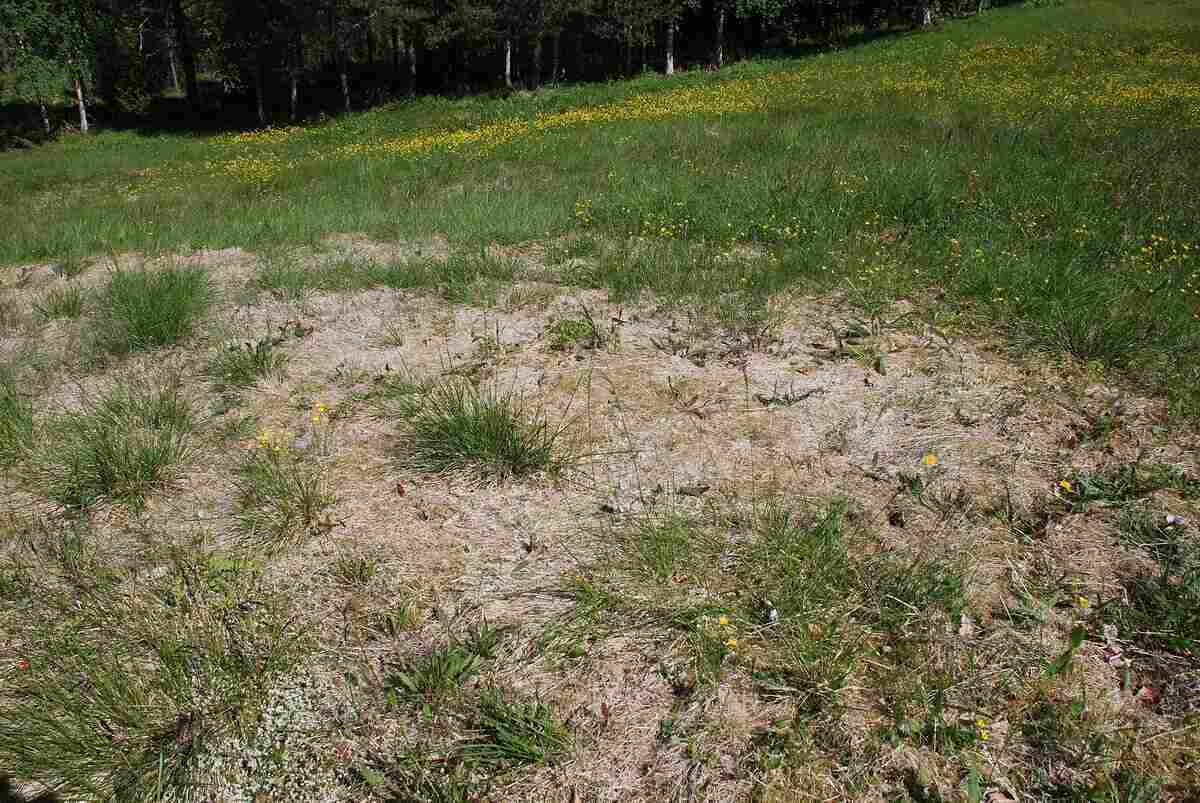
It spreads laterally through the thatch layer, which is why snow mould damage shows up in the characteristic circular or roughly circular pattern. The fungus grows outward from an origin point in a roughly even radius — producing those ring-shaped or disc-shaped dead areas that look so alarming when the snow finally melts.
The damage you see in spring — the matted, dead, greyish or pinkish grass — is the result of the fungus having consumed the organic material in the grass blades and thatch over the winter. The grass plants themselves may or may not be dead, depending on the severity of the infection and how deep it penetrated.
This is the most important distinction, and I’ll come back to it: snow mould kills grass blades, but it usually doesn’t kill the crown — the growing point at the base of each grass plant just above the soil. And as long as the crown is alive, the grass can recover.
Pink vs Grey — The Two Types You’ll See in Sudbury

Both types occur in Greater Sudbury, and knowing which one you’re dealing with matters because they behave differently and have different implications for recovery.
Grey Snow Mould — The More Common Type
Grey snow mould is the type I see most frequently on Sudbury lawns. It requires snow cover to develop — it only activates under snowpack — which means it appears in spring and stops spreading once the snow melts and the lawn is exposed to air and sunlight.
The appearance: circular patches of matted, tan to grey-coloured dead grass, typically ranging from a few inches to a foot or more in diameter. The patches may have a slightly crusty or webbed texture at the margins when the snow first melts — this is the fungal mycelium, which dries out and becomes inactive within days of snow melt as the lawn dries and warms.
The good news about grey snow mould: it stops spreading the moment conditions change. Once the snow is gone and the lawn starts drying out, the active infection is over. Whatever damage is visible in spring is the full extent of the damage. It won’t spread further through summer.
Pink Snow Mould — The More Serious Type
Pink snow mould is less common in Sudbury but more serious when it appears. Unlike grey snow mould, pink snow mould doesn’t require snow cover — it can remain active in cool, wet conditions even without snow. This means it can continue spreading in early spring if conditions stay cool and wet after snowmelt.
The appearance: pinkish to salmon-coloured patches, sometimes with a more distinct pink or orange tinge at the active margins. The patches may look slightly different from grey snow mould — less uniformly grey, with more colour variation at the edges.
The more serious concern with pink snow mould is that it can penetrate to the crown — killing the grass plant rather than just the blades. Grey snow mould primarily damages the blade and thatch layer while leaving the crown intact. Pink snow mould, in severe cases, kills the whole plant.
Practically, this means grey snow mould areas often recover with basic cleanup and time, while pink snow mould areas sometimes require overseeding or sod because the plant itself has been killed.
In most Sudbury springs, what homeowners are seeing is grey snow mould. But if patches haven’t shown any new growth by four to six weeks after snowmelt despite proper care — consider that the crowns may be dead and overseeding or sod may be needed.
How Bad Is Yours — Assessing the Damage Honestly

Not all snow mould is equal. Before you decide what to do, assess what you’re actually dealing with.
Mild Snow Mould
A few scattered patches, each less than six inches across, covering less than 10 percent of the total lawn area. The grass around and between the patches looks normal or nearly normal. The dead areas are clearly localized and defined.
This level of snow mould typically resolves with minimal intervention. Rake the matted areas to improve air circulation, wait for the lawn to dry out and warm up, and the surrounding grass will grow into the affected areas within a few weeks. No overseeding, no major work needed.
Moderate Snow Mould
Multiple patches, ranging from a few inches to a foot or more across, covering 10 to 30 percent of the lawn. Some areas show overlapping or merging patches. The affected grass is matted and clearly dead in the centres of patches.
This level needs active attention but is still recoverable without full replacement. Thorough raking of the affected areas, core aeration across the whole lawn, and overseeding into the damaged areas will produce visible recovery within four to six weeks in spring growing conditions. The lawn should look reasonably normal by mid-summer.
Severe Snow Mould
Large patches — a foot or more across — covering more than 30 percent of the lawn, or cases where patches have merged into large dead zones. Little healthy grass remains in the affected areas.
This level may require sod on the worst sections rather than overseeding, particularly if the damage is so extensive that natural recovery would take the entire growing season. I’ve seen severe snow mould as part of the broader lawn decline I described in what happens to a Sudbury lawn when you skip maintenance for a full season — snow mould on a lawn that went into winter in poor condition is significantly worse than snow mould on a well-prepared lawn.
The Crown Check
To assess whether the grass crowns are still alive in affected areas, wait two to three weeks after snowmelt and look for any new green growth emerging from the centre of damaged patches. Even a small amount of new growth means the crowns are alive and the grass will recover. No growth at all after three weeks of spring growing conditions, on patches that have been properly raked and exposed — those crowns are likely dead and that area needs to be reseeded or sodded.
What to Do After Snow Mould — The Recovery Steps
Here’s the exact sequence I recommend for snow mould recovery in Greater Sudbury, from the moment the snow melts through the end of spring.
Step 1 — Rake the Affected Areas
As soon as the snow is melted and the lawn is accessible, rake the snow mould patches thoroughly. The goal is to break up the matted dead grass and improve air circulation to the soil surface. The fungus can’t survive exposure to air and light — raking accelerates its die-off and gives the surviving grass plants room to grow.
Use a firm rake — not a leaf rake. You want to actually pull up the dead matted material, not just push it around. Rake in different directions to open up the mat fully.
Don’t be afraid to be vigorous. Healthy crowns won’t be damaged by raking. If material pulls up easily with no resistance, it’s dead thatch and you want it removed. If you feel resistance — the roots are still attached and the plant is alive.
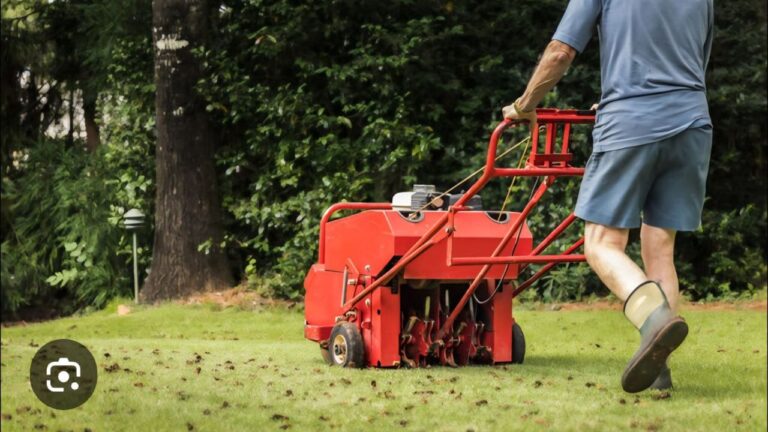
Step 2 — Core Aeration
Spring is one of the two best times for core aeration in Sudbury — fall being the other. Aerating immediately after snow mould cleanup accomplishes several things at once: it relieves the compaction that built up over winter, it opens the soil surface for overseeding to follow, and it helps break down the remaining thatch that the snow mould was feeding on.
I’ve covered why aeration is the single most important maintenance task for Sudbury’s clay-heavy soil in the most common thing I find under dead Sudbury lawns. Snow mould damage on a compacted, thatchy lawn is almost always worse than on a properly aerated, maintained lawn — because the thick thatch layer is exactly what the fungus uses to spread through winter.
Annual aeration is also the most effective preventive measure against severe snow mould in future years. Thinner thatch — maintained by regular aeration — gives the fungus less material to spread through.
For the full spring aeration sequence in Sudbury, I’ve detailed it in the 2-week spring window that makes or breaks Sudbury lawns.
Step 3 — Overseed Damaged Areas
Immediately after aeration — same day if possible — overseed the snow mould affected areas. The aeration holes give seed direct soil contact, which is the single most important factor in germination success. Seed broadcast on compacted, unbroken soil sits on the thatch surface and fails to germinate at a fraction of the rate of seed going into aeration holes.
Use a quality cool-season blend appropriate for Sudbury conditions — Kentucky bluegrass, fine fescue, or perennial ryegrass. Spread at the full recommended overseeding rate in affected areas. Rake lightly to help seed into the holes. Keep consistently moist for 10 to 14 days.
Spring overseeding after snow mould in Sudbury works well because soil temperatures are warming, the grass is in active growth mode, and new seedlings have the full growing season ahead of them before any heat stress arrives.
Step 4 — Fertilize
Apply a quality spring fertilizer after aeration and overseeding. The aeration holes carry nutrients directly to the root zone — this is the most efficient fertilizer application timing of the year. For spring, look for a formulation with higher nitrogen to support the leaf and shoot growth the lawn needs to recover from winter and fill in the damaged areas.
Step 5 — Don’t Cut Too Short
As the lawn recovers through spring, maintain the correct cutting height — 3 inches minimum. Short cutting on a lawn recovering from snow mould stresses the grass exactly when it needs leaf surface most. I’ve explained the full impact of cutting height on Sudbury lawn health in the most common lawn mowing mistake I see every week in Sudbury.
How to Prevent Snow Mould From Being This Bad Next Year
Snow mould can’t be completely prevented in Sudbury — our winters create the conditions for it inevitably. But its severity can be significantly reduced with proper fall preparation.
The two most impactful fall steps for snow mould prevention are:
Final mow at the right height. Grass going into winter at 2.5 to 3 inches has less material to mat down under snow than grass left at 4 to 6 inches. Long grass matting under snow is one of the primary conditions that makes snow mould worse. The correct fall mowing height and sequence is detailed in how to prepare your Sudbury lawn for winter — the October checklist.
Get the leaves off before snow. A thick layer of leaves under snow creates the same mat conditions as long grass — perfect snow mould incubation. Clear the lawn completely before snowfall.
Fall aeration. Reducing thatch through annual fall aeration removes the food source the fungus uses to spread. Lawns with thin, well-managed thatch get significantly less severe snow mould than lawns with thick thatch buildup.
Is Your Snow Mould Worse Than Normal This Year?
If you’re looking at your lawn this spring and the damage seems extensive — large patches, significant dead coverage, patches that aren’t responding after several weeks — reach out. I’ll come out, assess the damage honestly, and tell you what level of recovery work makes sense for your specific lawn.
Sometimes it’s just cleanup and overseeding. Sometimes it’s more. The right answer depends on what’s actually in front of you — not a general guide.
📞 Call or text me: 705-507-6787
Or fill out the free quote form here — I get back to everyone same day.
— Ryan Lingenfelter
Owner, Cutting Edge Lawn & Landscaping
Garson, Ontario
Related Articles
- How to Prepare Your Sudbury Lawn for Winter — October Checklist
- The One Thing I Always Find Under a Dead Sudbury Lawn
- The 2-Week Window in Sudbury That Makes or Breaks Your Lawn All Summer
- What Happens to a Sudbury Lawn If You Skip Maintenance for One Full Season
- The One Lawn Mowing Mistake I See Every Week in Sudbury
- Core Aeration Services in Greater Sudbury
- Lawn Aeration Near Me in Sudbury — Cost, What to Expect, and What to Ask