

I’m Ryan Lingenfelter — owner of Cutting Edge Lawn & Landscaping in Garson, Ontario.
I want to tell you about a property in Hanmer.
The homeowner — I’ll call him Dave — called me in late April. He’d bought the house two years earlier. The lawn had looked decent when they moved in. First winter, it came out looking rough. He figured it was just an adjustment year. Second winter, it came out looking worse. Now heading into year three, he was standing in his backyard looking at a lawn that was maybe 30% actual grass, 40% weeds, and 30% bare dirt.
His neighbour across the street had a lawn that looked like a golf course. Same street. Same soil. Same Sudbury winters. Different result.
Dave wanted to know why. And he wanted to know if his lawn could ever look like that.
I told him yes. And I told him exactly what it was going to take.
By September of that same year, Dave’s lawn was better than his neighbour’s. His kids were playing on it. His wife sent me a photo. He’s called me back every season since.
Here’s exactly what we did — every step, in the order we did it, and why each one mattered.
Step 1 — Understanding Why the Lawn Was Failing Before Touching Anything
The first thing I did when I walked Dave’s property was not look at the grass. I looked at the soil.

I pushed a screwdriver into the ground in six different spots around the yard. In every single spot, it stopped before two inches. That’s severe compaction — not just the normal Sudbury clay compaction that most properties have, but years of accumulated freeze-thaw compression on a lawn that had never been aerated once since the house was built.
Then I pulled on the grass in the bare patches. Some of it came up like a loose carpet — root system completely gone underneath. That’s grub damage. I cut a one-foot square of turf in the worst area and counted eleven white larvae. Way above the damage threshold.
Then I walked the slope on the south side of the yard. Water marks on the fence posts showed exactly where runoff was pooling. That low corner was holding water for weeks in spring, drowning the root system before the season even started.
Three problems. Compaction. Grubs. Drainage. Every one of them was causing lawn failure independently. Together they’d destroyed the lawn systematically over two winters.
Here’s what I told Dave: the lawn isn’t failing because of anything you did or didn’t do in terms of maintenance. It’s failing because of three structural problems that have never been addressed. Fix the structure and the lawn will respond. Keep treating the symptoms and you’ll be calling me again in three years with the same lawn.
He asked me to fix it.
Step 2 — Spring Cleanup and Full Assessment
We started in early May with a complete spring cleanup. Power raking to pull the thatch layer that had built up — on a lawn that’s never been properly maintained, thatch can get an inch thick and essentially seal the soil surface. Cleared all the winter debris. Cleaned the edges.
The cleanup served two purposes. First, it got the dead material off the surface so everything we did next could actually reach the soil. Second — and this matters more than people realize — it gave us a completely clear picture of what we were working with once the surface debris was gone.
After the cleanup, the lawn looked even worse than before we started. That’s normal. The thatch had been hiding how thin the grass actually was. Now we could see exactly which sections had recoverable grass and which sections needed to be replaced entirely.
The verdict: the front yard was thin but recoverable — maybe 65% live grass after the thatch was gone. The backyard was a different story. The grub-damaged sections, the drainage corner, and the areas that had been smothered by thatch were all at less than 30% live grass. Those sections needed sod, not repair.
Step 3 — Grub Treatment Before Anything Else Goes Down
This is the step most people skip and then wonder why the sod they laid fails the following year.
You can replace damaged lawn sections perfectly — proper soil prep, quality sod, correct installation — and if you don’t treat the grub population, the same grubs that killed the original lawn will kill the new sod within two seasons. I’ve seen it happen. It’s an expensive lesson.
We applied grub control to the affected areas in mid-May, timed for when the larvae are near the surface and most vulnerable. This needs to happen before any soil work or sod goes down — you need the treatment to reach the grubs in the soil, not get buried under a layer of new topsoil.
We gave it two weeks to work before moving to the next phase.
Step 4 — Core Aeration Across the Entire Property
In late May, we aerated the entire property — front yard, backyard, side yards. Every section, including the areas we were going to sod.
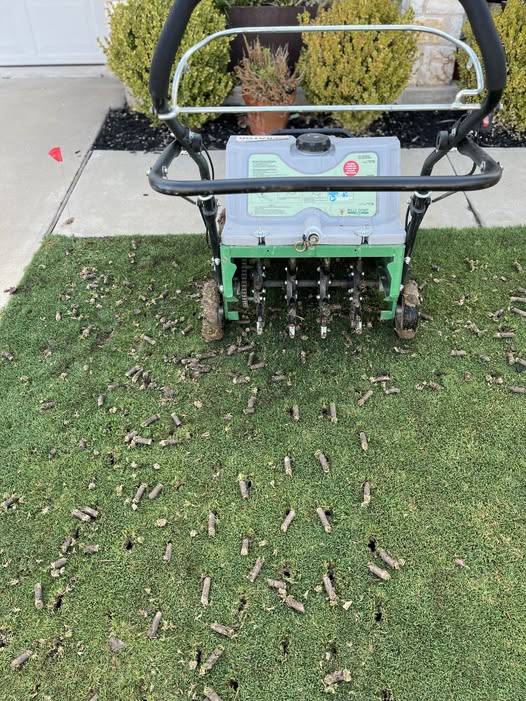
Some people ask why we aerate before sodding. The answer is that the sod needs to root into the soil beneath it, and on compacted Sudbury clay, that rooting process is slow and unreliable without first opening up the surface. The aeration holes create pathways for the sod roots to push down into the soil immediately after installation. On an un-aerated Sudbury clay surface, sod can sit for three weeks before making meaningful root contact. On an aerated surface, rooting starts within days.
For the sections we were overseeding rather than sodding — the front yard — aeration is even more critical. Seed needs direct soil contact to germinate. On compacted clay without aeration, most seed sits on the surface and never establishes. The aeration holes are essentially perfect seed beds — direct soil contact, moisture retention, protection from birds. Overseeding into fresh aeration holes on Sudbury clay produces dramatically better germination rates than broadcast seeding on an un-aerated surface.
Dave asked me after we finished the aeration if this was the most important thing we did. I told him it was tied for first.
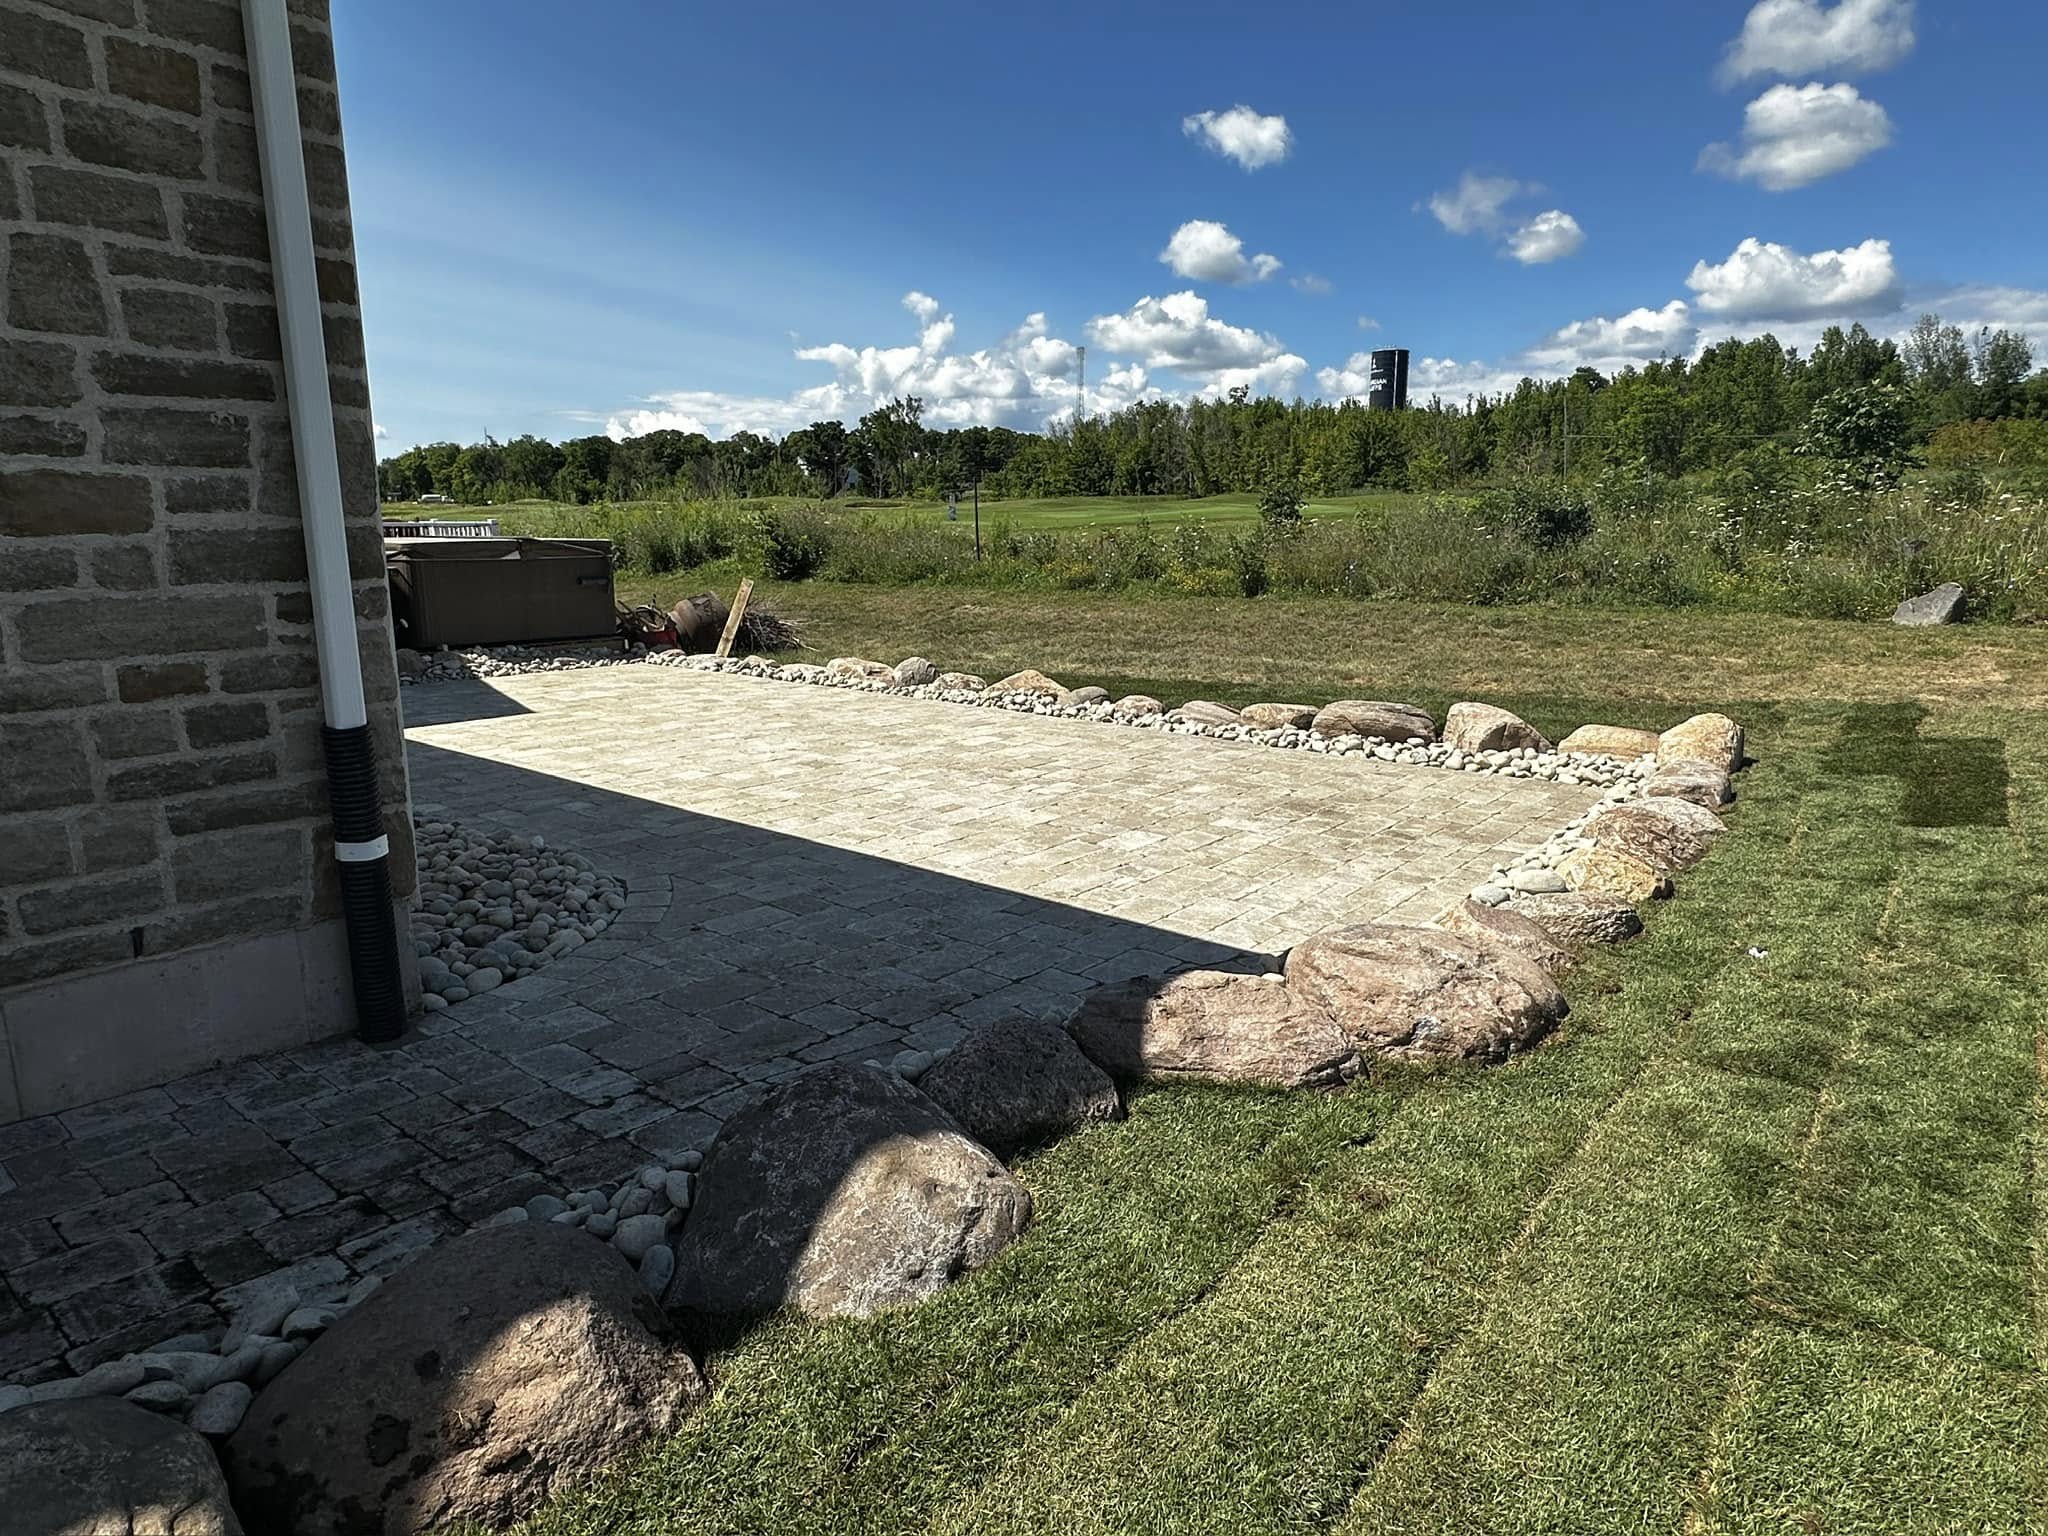
Step 5 — Drainage Correction on the South Corner
Before any sod went down in the backyard, we addressed the drainage problem in the south corner.
We brought in three yards of quality topsoil and built up the low area so that water would drain toward the side of the property instead of pooling in the corner. The grading work took about four hours — not dramatic work, not particularly visible work, but fundamental to whether everything else we did would hold.
I want to be specific about why this step had to happen before the sod. If we’d laid sod into that low corner without fixing the grade, the same thing that killed the original grass would kill the new sod. The corner would pool water in spring, the roots would drown, and Dave would have a dead section in the exact same spot the following May.
Drainage correction is the invisible work that makes everything else permanent. I’ve written about this before — it’s the step I’ve most often seen skipped, and it’s the step that most often leads to a repeat call two years later. I told Dave this was the insurance policy on everything else we were about to do.
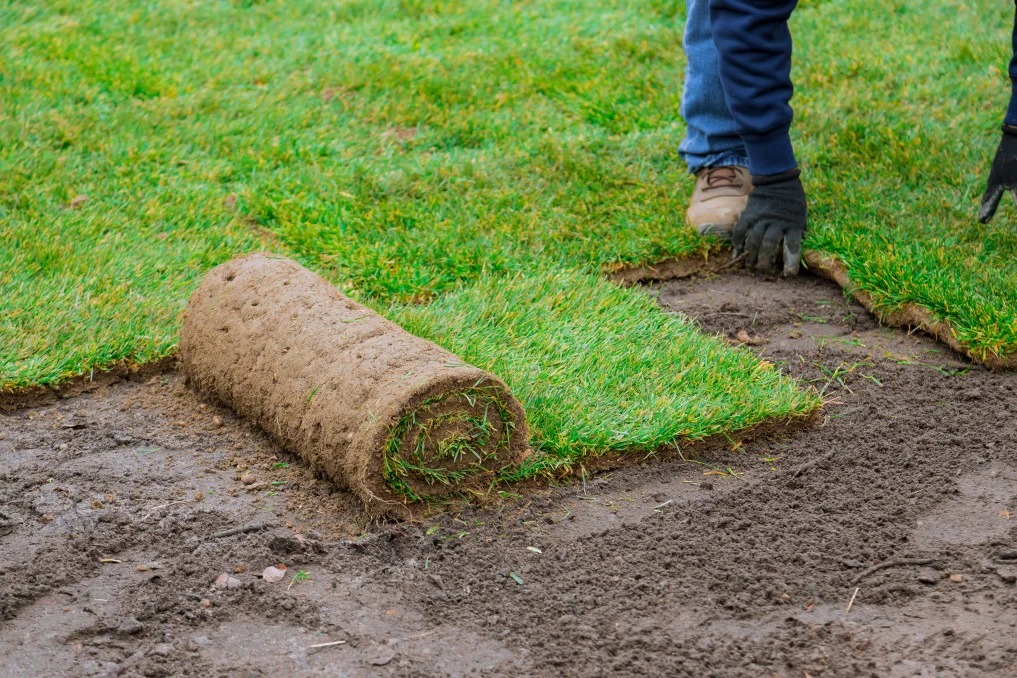
Step 6 — Sod Installation on the Damaged Sections
With the grubs treated, the soil aerated, and the drainage corrected, we were ready to lay sod on the backyard sections that were beyond recovery.
We tilled the top four to six inches of soil in the sod areas to break up the remaining compaction below the aeration depth. We mixed in fresh topsoil to improve the root environment — on Sudbury’s clay-heavy lots, sod performs significantly better when it has quality soil to push roots into rather than pure clay. We graded the surface carefully so every section would drain properly and mow cleanly.
The sod went down on a Thursday morning — fresh cut, delivered same day, moist and in good colour. We worked from the straightest edge inward, staggering the joints like brickwork so the seams would be invisible once the grass knit together. Every piece pressed firm against the next — no gaps anywhere. Tight seams don’t dry out. Gaps do.
We rolled the entire sod area once it was down to press the roots into firm contact with the soil. On Sudbury clay, contact is everything in the first 72 hours. Those roots need to be touching soil to start pulling moisture and beginning the establishment process.
By end of day, the backyard sections were completely transformed. Dave came out when we were rolling and just stood there. I’ve seen that reaction before. It never gets old.
Step 7 — Overseeding the Front Yard
The front yard didn’t need replacement — it had a recoverable base of grass. But it was thin, and some sections needed filling in.
After the aeration, we overseeded the thin areas with a cool-season blend appropriate for Sudbury’s climate — a mix that handles clay soil, Sudbury’s temperature range, and the partial shade the front yard gets from the mature maple on the property line.
Seed selection matters more than most people realize. Bag of generic “lawn seed” from the hardware store contains a mix optimized for an average lawn in an average climate. Sudbury is not an average climate. You want a blend with strong fescue content for drought tolerance and a grass type that handles clay and cold well. Getting the seed mix right doesn’t cost more — it just requires asking the right question when you’re buying it.
The overseeding went into the aeration holes directly. We raked lightly to press seed into soil contact. Then the most important part of the whole overseeding process: a consistent watering schedule for the next three weeks.
Step 8 — The Watering Schedule That Made It All Work
New sod and new seed both need consistent moisture to establish — but they need it differently, and getting this wrong can undo everything else.
For the new sod, we gave Dave a clear schedule:
Days 1 through 7 — water twice daily, morning and late afternoon. The goal is keeping the soil consistently moist 2 to 3 inches deep. Not puddles, not dry — consistently moist.
Days 8 through 14 — pull back to once daily, deeper watering. You’re now encouraging the roots to push down to find moisture rather than staying shallow.
Days 15 through 21 — every other day. By now the sod should be rooting in. You can test by gently pulling a corner — if it resists, roots are taking hold.
Week 4 onward — treat it like an established lawn. Normal watering schedule.
For the overseeded front yard, the first three weeks were the critical window. Seed needs consistent moisture to germinate and stay germinated. The biggest mistake people make with overseeding is watering well for a week, seeing germination start, and then getting busy and letting it dry out for two days. Those seedlings die. They don’t come back. You’ve lost your establishment window.
Dave set up a timer on his hose. He didn’t miss a day for three weeks. That discipline is a significant part of why the front yard came in as well as it did.
What the Lawn Looked Like by September
By mid-September, four months after we started, Dave’s lawn looked better than anything on his street.
The sod sections in the backyard were completely indistinguishable from the original lawn — thick, even, deep green. You couldn’t tell where the old dead patches had been. The front yard had filled in to a consistent stand of grass with no visible thin spots. The south corner that had drowned every spring was dry, level, and growing.
His neighbour — the one with the “golf course” lawn — came over and asked what Dave had done.
That’s the result of doing the right things in the right order. Not magic. Not expensive products. Not luck. Just a correct diagnosis, a proper plan, and each step done right before moving to the next one.
The reason most lawn restoration attempts fail isn’t that the lawn was beyond saving. It’s that the work gets done in the wrong order, or the root cause gets missed, or one step gets skipped because it seemed less important. On Dave’s property, any one of the three root causes — compaction, grubs, drainage — would have continued to undermine the lawn if it hadn’t been addressed. All three needed to be fixed. They were.
Is Your Lawn in the Same Situation?
If you’re looking at a lawn right now that looks like Dave’s did in April — patchy, thin, struggling year after year despite whatever you’ve tried — the problem almost certainly has a cause that hasn’t been identified or addressed yet.
The fix isn’t always as involved as what we did for Dave. Some properties just need aeration and overseeding. Some need a single drainage correction. Some need a partial sod replacement. The scope depends on what the actual problems are.
What I can tell you is that showing up and doing the same thing again this year on a lawn that hasn’t responded to it isn’t a strategy. At some point you need someone to walk the property, identify what’s actually causing the problem, and give you an honest answer about what it’s going to take to fix it.
That’s what a quote call with me looks like. I’ll walk the property with you, tell you exactly what I see, and give you a straight answer — including what it will cost and what it won’t.
📞 Call or text me directly: 705-507-6787
Or fill out the free quote form here and I’ll get back to you same day.
We service Garson, Val Caron, Hanmer, Lively, Chelmsford, Azilda, Capreol, and all of Greater Sudbury.
— Ryan Lingenfelter
Owner, Cutting Edge Lawn & Landscaping
Garson, Ontario
Frequently Asked Questions
Can a completely dead lawn in Sudbury be restored in one season?
Yes — if the root causes are correctly identified and addressed in the right order. Most dead or severely struggling Sudbury lawns have one or more underlying causes: soil compaction, grub damage, drainage problems, or some combination. When those causes are fixed properly — aeration for compaction, grub treatment before sodding, drainage correction before laying new grass — a full restoration in a single season is achievable. Treating only the surface without fixing the underlying problems produces temporary results at best.
What causes a Sudbury lawn to keep failing year after year?
The most common causes of persistent lawn failure in Greater Sudbury are severe clay soil compaction from years without aeration, active grub populations that destroy root systems, and drainage or grading issues that drown roots in spring. These problems don’t resolve on their own and aren’t fixed by surface treatments like fertilizer, seed, or weed control. They require structural intervention — aeration, grub treatment, soil correction — before any maintenance or cosmetic treatment will produce lasting results.
How much does a full lawn restoration cost in Sudbury?
A full restoration on a standard residential property in Greater Sudbury — spring cleanup, core aeration, grub treatment, drainage correction, sod on damaged sections, and overseeding of thin areas — typically runs $2,500 to $4,500 depending on lot size and the extent of the damage. Properties with minor damage that only need aeration and overseeding can come in significantly less. A free on-site quote gives you the accurate number for your specific property.
Should I sod or overseed a damaged Sudbury lawn?
It depends on how much live grass is left. If more than 50% of the lawn is still alive, overseeding after core aeration is a cost-effective approach that can produce significant improvement within one season. If less than 50% is alive — dead patches, bare soil, heavy weed coverage — sod replacement on those sections is almost always the better long-term call. Overseeding into a mostly-dead lawn rarely produces lasting results because the underlying conditions that caused the failure are still present. I covered this decision in detail in my sod vs seed guide here.
How long does new sod take to establish in Sudbury?
With proper watering, new sod on a well-prepared Sudbury property typically starts rooting within the first week and is reasonably established by week three. You can test establishment by gently tugging a corner — resistance means roots are taking hold. Full establishment where the sod is indistinguishable from a mature lawn takes 6 to 8 weeks under good conditions. The critical variables are soil preparation before installation and consistent watering through the first three weeks.
Why do grubs keep coming back to my Sudbury lawn?
Grubs are the larvae of beetles that lay eggs in lawns every summer. Unless the adult beetle population in your area is controlled or conditions are made less favorable for egg-laying, new larvae will hatch every year. The key is timing the treatment correctly — grub control applied in early summer when larvae are young and near the surface is significantly more effective than treatment applied later. Repairing grub damage without treating the grub population results in the same damage recurring the following season.
Ryan Lingenfelter is the owner of Cutting Edge Lawn & Landscaping in Garson, Ontario. Since 2020, his crew has provided full lawn care and landscaping services across Greater Sudbury — Garson, Val Caron, Hanmer, Lively, Chelmsford, Azilda, and Capreol. Licensed, insured, BBB A+ rated, and ThreeBest Rated for lawn care services in Sudbury.
📞 Phone: 705-507-6787
📍 Service Area: Greater Sudbury, Ontario
🔗 Free Quote: cuttingedgelawn.ca/quote
Related Services
Continue Reading
- Dead Lawn to Green Sod in 4 Days — How We Did It
- Sod vs Seed in Sudbury — Which One Is Right for Your Lawn?
- 5 Lawn Care Mistakes Sudbury Homeowners Make Every Spring
- When Should You Actually Aerate Your Sudbury Lawn?
