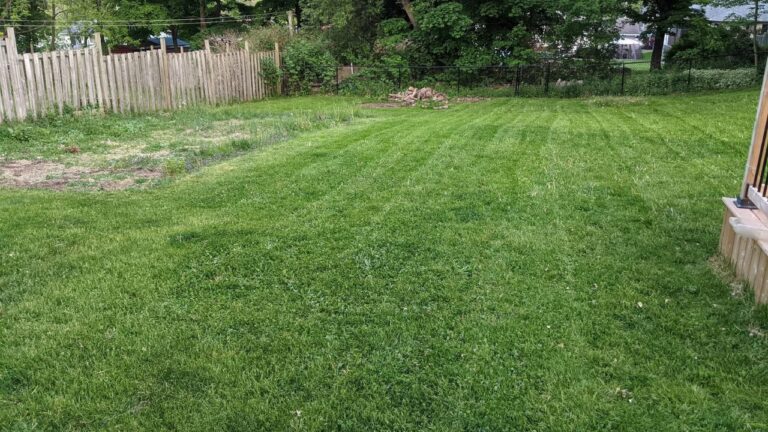
I’ve installed sod on over 200 properties across Greater Sudbury since 2020. Garson, Val Caron, Hanmer, Lively, Chelmsford, Azilda, Capreol — different soil conditions, different lot sizes, different terrain, different times of year.
And across all of those installs, one mistake accounts for more sod failures than every other cause combined. Not poor soil prep — though that matters. Not bad timing — though that matters too. Not the quality of the sod itself.
The mistake that ruins more Sudbury sod jobs than anything else happens after the crew leaves. It happens in the first two weeks. And almost every time, it was completely preventable.
Here it is: insufficient watering in the establishment window.
I know that sounds almost too simple for an article. But let me tell you exactly what “insufficient” means in practice, why it’s so much more damaging in Sudbury specifically than it is in most of Ontario, and what the right approach actually looks like — because the version most homeowners know about is vague in exactly the ways that cause the problem.
The Mistake — And Why It’s Almost Always the Same One
When sod is installed, it arrives with an existing root system — that’s what distinguishes it from seed. The roots in the sod roll are alive, the grass is alive, and the sod looks like a finished lawn the moment it goes down. That immediate visual result is part of why homeowners choose sod over seeding when they want faster results.
But that existing root system was severed from its original soil when the sod was harvested. The roots in the roll are short — maybe half an inch to an inch of active root length. For the sod to truly establish — to become a permanent part of your lawn rather than a very expensive mat sitting on top of it — those roots have to grow down into the prepared soil beneath the sod, making new connections, anchoring the grass, and reaching moisture reserves in the ground below.
That process takes two to four weeks. During those two to four weeks, the sod has almost no ability to access moisture from the soil beneath it because its roots haven’t reached down there yet. It’s surviving almost entirely on whatever moisture is present in the sod roll itself and whatever you’re putting on the surface.
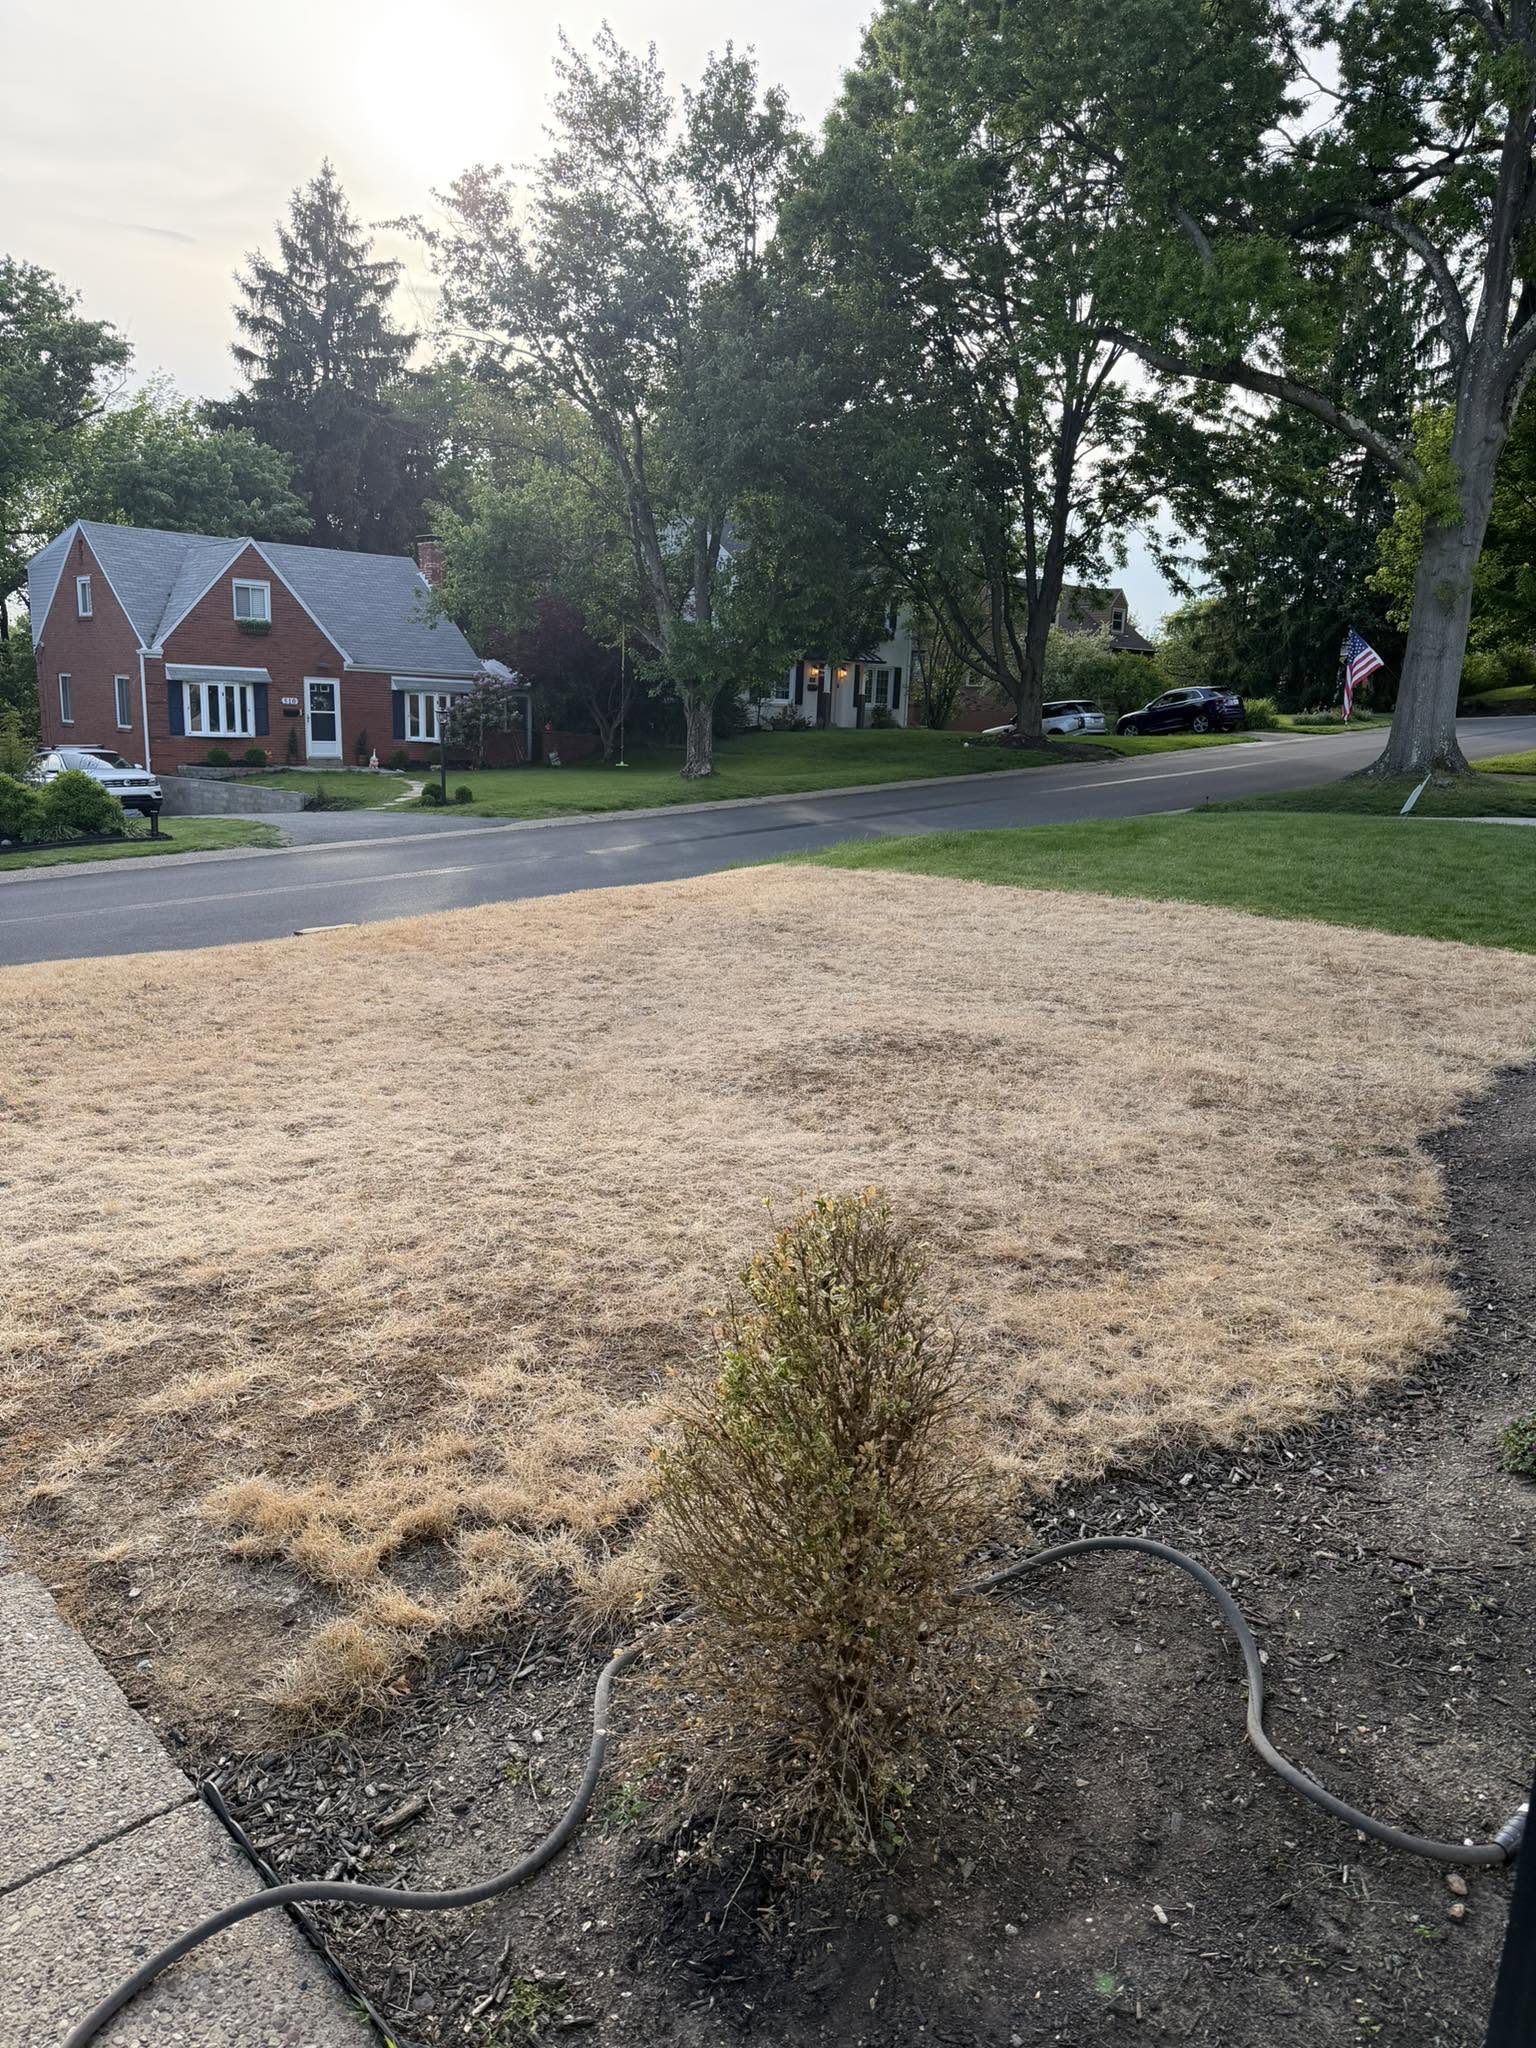
This is why watering in the establishment window is categorically different from watering an established lawn. An established lawn with roots several inches deep can tolerate missing a watering day. It has reserves to draw on. Newly installed sod with roots that haven’t connected to the soil yet has no reserves. When the surface moisture runs out, the sod is in distress almost immediately.
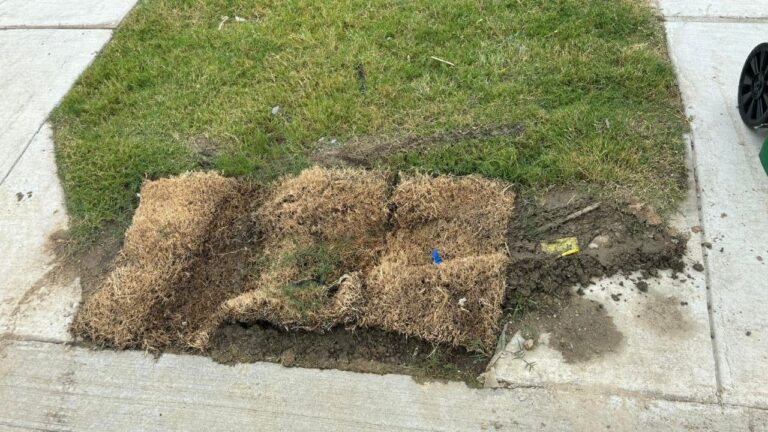
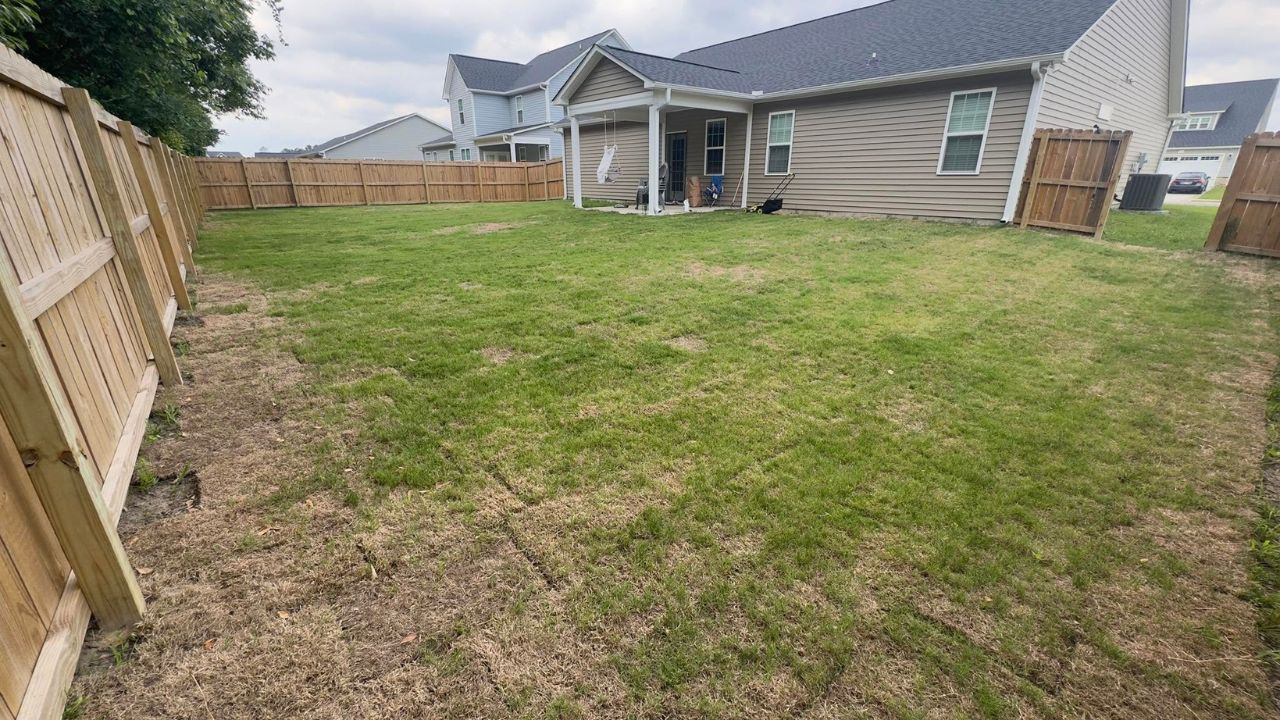
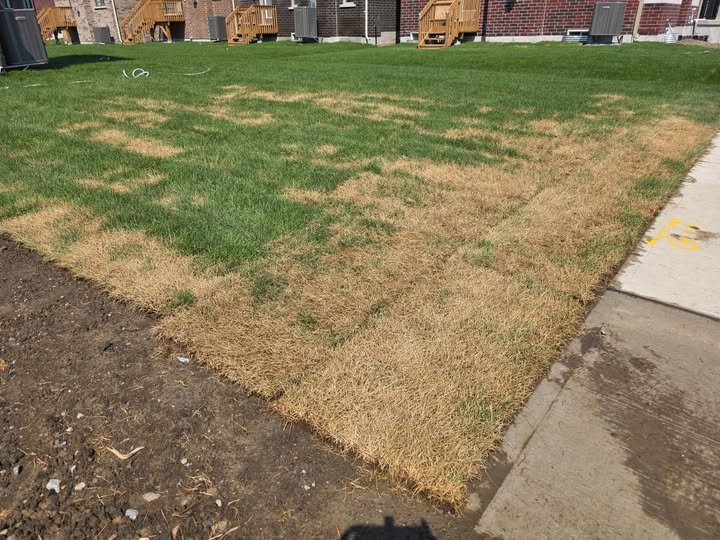
The first sign is the edges and corners drying out and pulling back from adjacent pieces or from the edge of the lawn area. Then sections start to yellow. Then sections die — first at the seams, then spreading inward. A sod job that looked perfect on installation day looks like a failure two weeks later, and the cause is almost always that the watering was either not deep enough, not frequent enough, or both.
I’ve walked properties where this has happened two or three weeks after installation, and the homeowner is convinced there was something wrong with the sod or something wrong with the installation itself. In the vast majority of cases, the installation was fine. The watering was the variable.
Why Sudbury Makes This Mistake More Damaging Than Anywhere Else
Here’s where Sudbury’s specific conditions make this mistake worse than it would be on a property in southern Ontario.
The Canadian Shield soil that underlies most of Greater Sudbury is thin. In many areas, the topsoil layer is 4 to 6 inches deep before you hit compacted glacial till or bedrock. That thin soil layer holds less moisture than the deeper soil profiles in most of Ontario. It warms faster in summer. It dries out faster when it’s not being actively replenished.
What this means for new sod is that the soil beneath the rolls — even when properly prepared and watered at installation — dries out faster than the same soil in a milder climate. A watering schedule that would be adequate for new sod in Barrie or Mississauga may not be adequate for new sod in Lively or Hanmer, because the soil underneath is shallower and loses moisture more quickly.
Add to this that Sudbury gets its share of hot, dry stretches in July and August — the same stretches I wrote about in the June window that determines August lawn performance — and you have conditions where new sod is under more moisture stress than most generic sod installation advice assumes.
The compounding factor is what I call the “looks fine” problem. New sod on a sunny Sudbury day can look perfectly green and healthy at 10am and be critically dry by 3pm in a way that the homeowner doesn’t notice until damage is already done. The green colour of healthy grass blade doesn’t immediately signal moisture stress the way a wilted plant would in a garden. By the time the sod visibly shows stress — edges yellowing, corners lifting — it’s already been without adequate moisture long enough that recovery is uncertain.
I’ve seen this play out on August installs especially, which is why the watering conversation I have before leaving every sod job is longer and more specific in summer than it is in a cooler installation month.
What Correct Watering Actually Looks Like — The Specifics Nobody Gives You
Most sod installation advice says something like “water daily for two weeks.” That’s true as far as it goes, but it’s vague in exactly the ways that lead to the failure I’ve described. Here’s the specific version.
The First 14 Days — Non-Negotiable
Water every single day for the first 14 days. Not every other day. Not when it looks dry. Every day, regardless of how the sod looks, regardless of whether there’s been some rain, unless there’s been a significant soaking rainfall — more than 20 to 25 millimetres in a day.
The reason you can’t rely on how it looks is the “looks fine” problem I described above. Sod can be approaching critical moisture stress while still looking superficially healthy. You water before you need to, not after.
Deep Enough to Wet the Soil Below the Sod
This is the specific detail that vague watering advice misses entirely. Watering the surface of the sod is not the goal. The goal is getting moisture through the sod and into the prepared soil below it, so that the roots have a reason — and a place — to grow downward.
How do you know if you’ve watered deeply enough? Lift a corner of a sod piece after watering. The soil underneath — not the sod itself, but the prepared soil below the roll — should be visibly damp to the touch. If you lift a corner and the soil underneath is dry, you’ve watered the sod surface but not reached the root destination. You need more water, more time per watering session, or both.
On a typical Sudbury property in summer, reaching adequate depth usually means running a sprinkler for 30 to 45 minutes per zone rather than 15 to 20 minutes. In hot weather or on properties with particularly thin soil, it can mean longer. The soil depth test — lifting a corner and checking below — is the only reliable way to know if you’re actually hitting the right depth.
Timing Within the Day
Water in the early morning. Not midday, not afternoon, not evening. Early morning watering gives the sod moisture before the heat of the day, and the surface has time to dry somewhat before evening, which reduces disease pressure. Midday watering loses significant moisture to evaporation before it reaches the soil. Evening watering leaves the surface wet overnight, which increases the risk of fungal issues in new sod.
Days 15 Through 30 — Transition Phase
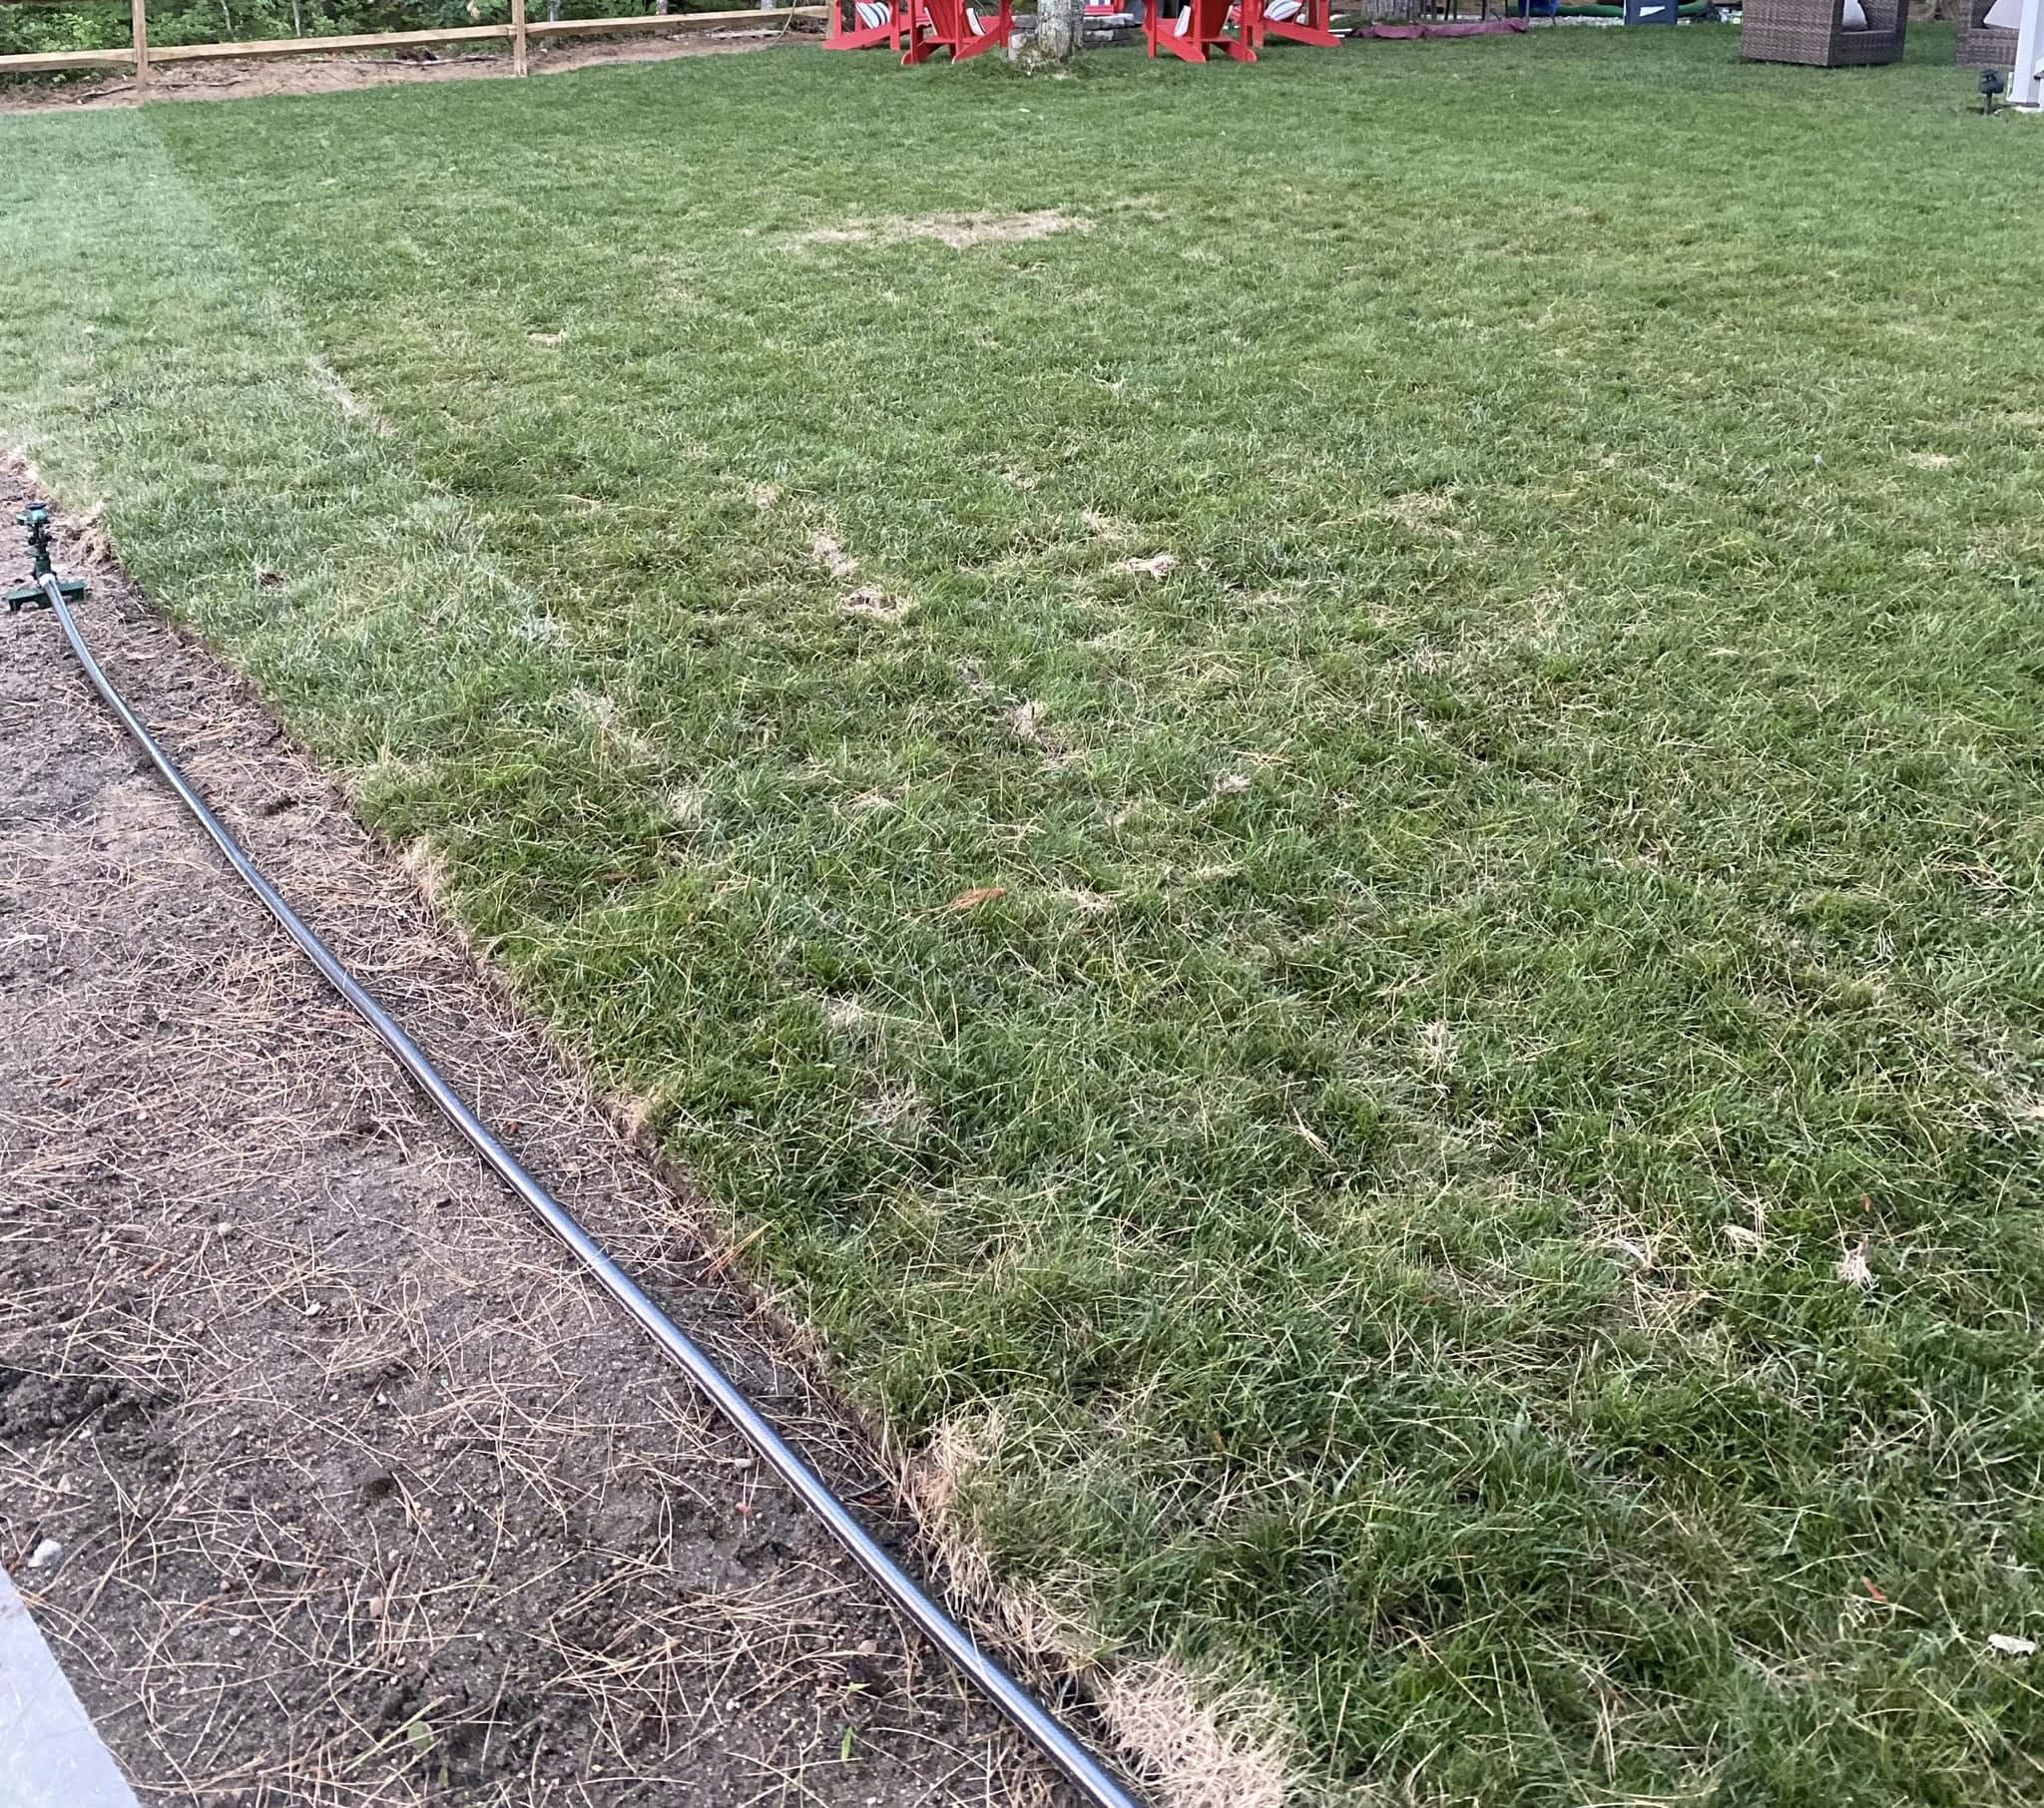
After the first two weeks, if the sod is rooting well — test by trying to lift a corner; if it resists and won’t lift easily, rooting is happening — you can move to every other day watering. Still deep enough to reach the soil below, just every other day rather than every day.
Don’t move to every other day before day 14 regardless of how good the sod looks. The rooting that’s happening in week two is still early stage and the sod is not yet independent of surface moisture supply. The two-week threshold is a minimum, not a target to reach early.
The Edges and Corners — Check These First Every Day
Sod fails at the edges and corners first, every time. The perimeter of each sod piece has less soil contact and less insulation than the centre. In Sudbury’s heat, the edges dry out fastest. Check the edges and corners when you go out to water each morning. If any edge is yellowing or starting to lift, that section needs extra attention — direct the sprinkler specifically at it and if possible press the edge back down into firm contact with the soil below.
Edges that are caught early and rehydrated almost always recover. Edges that are allowed to dry completely and die don’t — they need to be cut out and replaced, which is extra cost and effort that’s entirely preventable with daily edge checks.
What to Do If You Think Your Sod Is Already Failing
If you’re reading this because sod you had installed is showing signs of stress — yellowing sections, lifting edges, dry corners — here’s the honest assessment of what your options are, depending on where you are in the timeline.
Days 1 to 10 — Almost Always Recoverable
If you’re within the first 10 days and you catch the problem, aggressive recovery watering — twice daily in the morning and late afternoon for several days — can bring sod back from early moisture stress before permanent damage sets in. Press any lifted edges firmly back into contact with the soil. Soak the affected sections specifically, not just the general area.
At this stage, the roots haven’t started growing down yet regardless, so the sod hasn’t committed to either surviving or failing — it’s in a holding pattern that’s determined by whether moisture is restored before the grass tissue dies. Most sod in this situation can be pulled back.
Days 10 to 21 — Depends on the Extent
If sections have gone fully yellow or brown — not just stressed but actually dead — those sections are not coming back with watering. The grass tissue is dead. However, if the failure is limited to edges and corners and the centres of the sod pieces are still viable, you may be able to save the majority of the install by replacing only the failed perimeter sections while preserving the rooting progress in the centres.
Call me if you’re in this situation. Walking the property and assessing what’s actually dead versus what’s stressed-but-recoverable is something I can do quickly, and it determines whether you need partial replacement or whether recovery watering is still the right approach.
Beyond Day 21 With Significant Dead Sections
If more than 30 to 40 percent of the install has died by this point, the practical conversation shifts to partial or full replacement. I’ve written about how to think through the replace vs repair decision in detail — the same framework applies to failed sod as to any other lawn damage situation. What’s the extent of the dead area? What’s the condition of the surviving sections? What’s the soil situation? Those questions determine the right path forward.
One thing I’ll say directly: if sod failed because of inadequate watering and you’re considering having it replaced, the replacement will fail for the same reason if the watering approach doesn’t change. Before replacement, make sure the plan for the second install includes either a different watering setup — an irrigation system, a reliable timer on a sprinkler, a specific person committed to the daily schedule — or a timing adjustment to a cooler month where the watering margin is more forgiving. I’ve described what that looks like in the piece on August vs September sod installation timing.
The Conversation I Have Before I Leave Every Sod Job
I’ve described in the full sod installation day walkthrough that before I leave any sod job, I go through the watering schedule specifically with whoever is going to be managing it. Not a general mention — a specific conversation about what deep enough means, how to check for it, what the edges need, what to watch for, and what to do if something looks wrong.
That conversation is, in retrospect, one of the most important things I do on a sod job. Not the prep, not the laying, not the rolling — though all of those matter. The conversation at the end, making sure the person who’s going to be doing the watering actually understands what’s required, is what determines whether the installation holds.
There’s a version of this in everything I do on Sudbury properties. The work is only part of what determines the result — what the homeowner does or doesn’t do after matters too. I’ve written about that in the context of Christine’s property in Lively, where her commitment to the watering schedule after overseeding was what made the recovery actually work. Same principle applies here, just more concentrated and time-sensitive.
And in the fall, after the sod has established — make sure fall cleanup actually happens. New sod going into its first winter under a mat of unraked leaves is at significantly higher risk of snow mould damage than established sod. The investment you made in the install deserves protection through the winter, and fall cleanup is how you do that.
If You’re Planning a Sod Job in Sudbury
Book the install. But before you do, make sure you have a realistic plan for the watering — not “I’ll figure it out,” but an actual specific plan. Do you have a sprinkler that covers the area? Does it stay in place or does it need to be moved? Do you have a timer so it happens reliably even when you’re busy? Is anyone going to be away during the first two weeks after install?
These questions sound logistical and minor. They’re not. They’re the difference between a sod job that looks great six months later and one that’s back on the phone with me three weeks after install asking what went wrong.
I’ll have this conversation with you before we book anything. It’s part of how I operate — the same honesty about what’s required that I try to bring to every assessment and every job. For everything we offer, the complete service breakdown covers it all.
Call or text: 705-507-6787
Or fill out the free quote form on the site.
We cover Garson, Val Caron, Hanmer, Lively, Chelmsford, Azilda, Capreol, and surrounding areas.
— Ryan Lingenfelter
Cutting Edge Lawn & Landscaping
Garson, Ontario
705-507-6787