

I’m Ryan Lingenfelter — owner of Cutting Edge Lawn & Landscaping in Garson, Ontario.
My phone rang at 7:04 in the morning on a Tuesday in late June.
It was a customer in Val Caron. I’d installed about 1,400 square feet of sod at her property two weeks earlier. The install had gone well — good soil prep, quality sod delivered same day, tight seams, properly rolled, watering instructions walked through in detail before I left.
She was panicked. She said the sod was dying. Some sections had gone brown at the edges. One corner looked like it wasn’t taking at all. She’d been watering twice a day like I told her. She’d kept her kids and dog off it. She’d done everything right.
“Ryan, I think I killed it. I don’t know what I did wrong. Is it dead?”
I told her I’d be there within the hour.
When I pulled up and walked the lawn, I knew within about ninety seconds what was happening. The sod wasn’t dying. It was doing exactly what it was supposed to do. She just didn’t know what normal looked like at two weeks — and that was my fault, not hers.
That morning changed how I explain sod installation to every single customer since then. Here’s what I found, what it meant, and what I now make sure every homeowner understands before I leave a freshly sodded property.
What I Found When I Got There
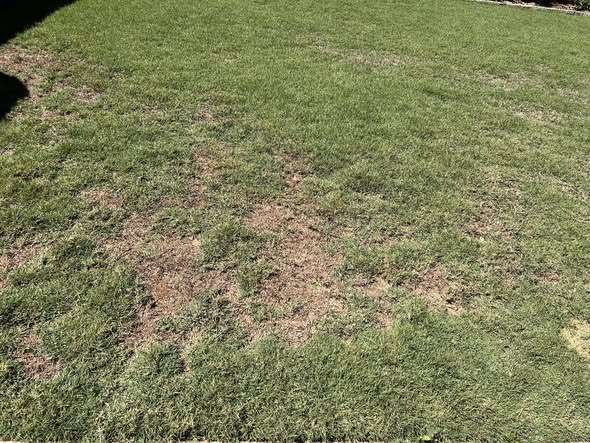
The first thing I did was kneel down and look at the seams between the sod rolls. The browning she was seeing was concentrated at the edges of each piece — the seams where one roll met the next.

This is normal. It’s one of the most common things I see on sod installations in weeks one and two, and it almost always looks more alarming than it is.
Here’s what’s happening. When sod is cut and rolled at the farm, the edges of each roll are the most exposed. They have the least root mass, the least soil contact, and the least protection from the sun and wind compared to the centre of each piece. In the first two weeks before the sod has rooted into the soil below, those edges are dependent on surface moisture. If a watering session doesn’t reach them consistently — if a sprinkler pattern leaves small gaps, or if there’s a slight elevation change at the seam — the edge dries out faster than the centre.
That browning at the seams does not mean the sod is dead. It means the edges are experiencing some moisture stress while the roots are still establishing. Once the roots push into the soil — which happens within 10 to 21 days on a well-prepped Sudbury property — the whole piece starts pulling moisture from below rather than depending on surface watering. The brown edges usually green back up within another week or two after rooting.
The corner she was most worried about was a different story. I pushed on it gently. It gave slightly — less resistance than the rest of the lawn. I lifted one edge carefully and looked underneath.
Dry soil. That corner had a slight elevation change that was causing her sprinkler to undershoot it by about two feet. It was getting almost no water.
Not dying. Not rooted. Just dry.
I adjusted her sprinkler pattern to cover that corner properly. Within five days she texted me a photo. The corner was green.
What Normal Looks Like at Every Stage of Sod Establishment
After the Val Caron call, I realized that what I’d been failing to do was tell homeowners what to expect at each stage — not just what to do. There’s a big difference between “water twice a day for the first week” and “here’s what your lawn will look like at day 3, day 7, day 14, and day 21.” Both pieces of information matter.
Here’s what I now tell every customer after installation.
Days 1 through 3: The sod looks almost exactly like it did when it went down. The colour is good, the surface is uniform. Underneath, the roots are just beginning to sense the soil below. If you lift a corner it comes up easily — there’s essentially no rooting yet. This is normal. Don’t panic and don’t change anything. Keep watering as instructed.
Days 4 through 7: You may start to see slight colour variation between pieces — some sections slightly darker, some slightly lighter. This is normal variation in how individual rolls are responding. The seam edges may start to look slightly different from the centres of each piece. The sod is still dependent on surface moisture. Keep watering twice daily without fail.
Days 7 through 14: This is the stage that produces the most panic calls. The seam edges can look visibly different from the centres — sometimes yellowed, sometimes slightly brown. One or two spots may look like they’re struggling. This is the most alarming-looking stage of a completely normal establishment process. Underneath, the roots are pushing into the soil. You can test by trying to lift a corner — you should feel more resistance than in week one. If it resists at all, roots are taking hold. Keep watering.
Days 14 through 21: The sod should start to look noticeably more uniform. Seam lines begin to disappear as the grass from adjacent pieces grows together. Brown seam edges usually start greening up as the roots establish and the plant begins pulling moisture from the soil rather than depending on surface watering. By day 21, the tug test — gently pulling a corner — should produce clear resistance.
Day 21 onward: Reduce watering frequency. The sod is establishing. The lawn should look increasingly uniform. The seam lines should be nearly invisible by day 28 to 35.
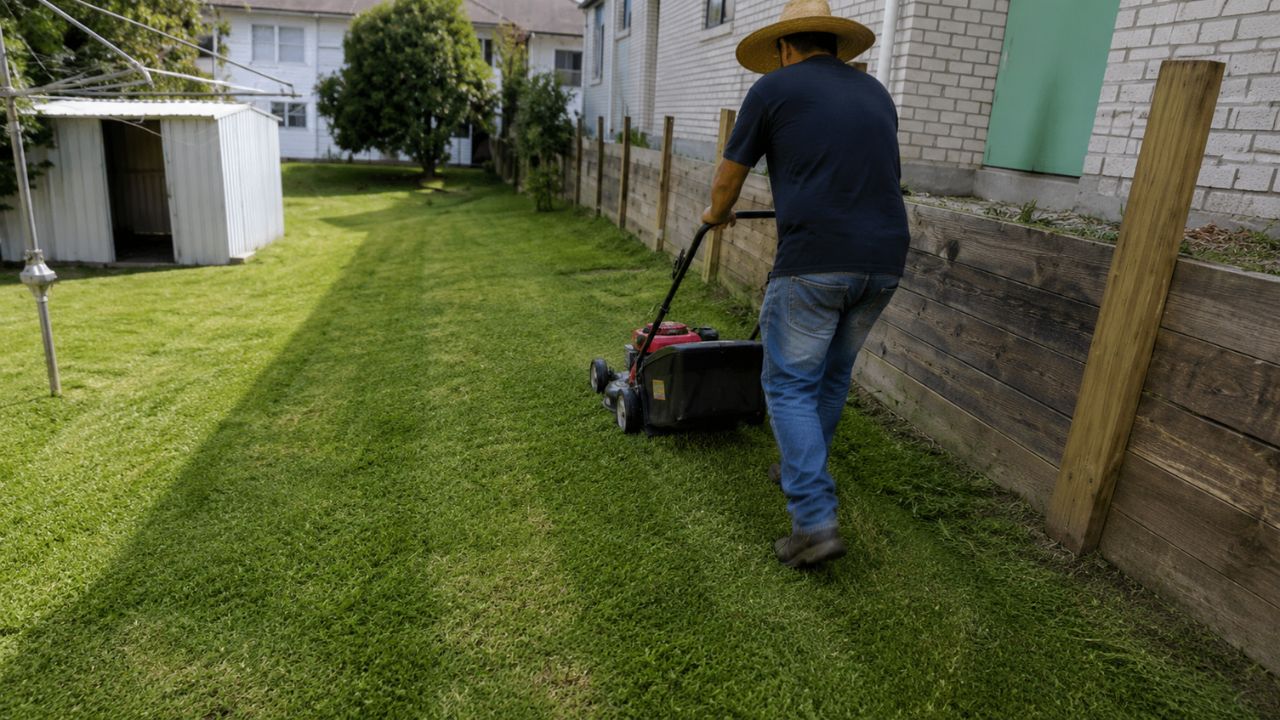
First mow: Wait until the grass reaches 3.5 inches. Don’t mow before this — you’ll pull the sod up if the roots aren’t fully anchored. When you do mow, use the highest deck setting for the first cut and don’t remove more than one-third of the blade length.
The Four Things That Actually Kill New Sod in Sudbury
The Val Caron situation was a watering coverage gap — fixable, not fatal. But I’ve seen sod installations fail for real, and it’s almost always one of four causes.

Inconsistent Watering in the First Two Weeks
This is the most common cause of actual sod failure. New sod is completely dependent on consistent surface moisture until the roots establish. Miss two consecutive waterings in the first week during a warm June stretch in Sudbury, and sections can dry out past the point of recovery.
“Twice a day” means twice a day, every day, for the first seven days — not most days, not when it’s convenient. The roots aren’t in the soil yet. There’s no backup moisture system. If the surface dries out, the sod dries out.
The most common scenario I see: homeowner waters well for the first four days, then has a busy weekend, misses a Saturday afternoon watering, misses Sunday morning, and by Sunday afternoon a section has dried out and gone beyond recovery. Six days of perfect watering undone by 36 hours of skipping.
Sprinkler Coverage Gaps
Like the Val Caron corner — a sprinkler that misses a section by two feet produces a section that gets almost no water. On an established lawn this matters but isn’t critical because the roots pull moisture from a larger soil area. On new sod it’s potentially fatal because the entire moisture supply comes from whatever hits the surface directly.
Before I leave any installation, I now ask the homeowner to run their sprinkler while I’m still there so I can watch the coverage pattern. If there’s a gap, we fix it before I leave rather than getting a 7am call two weeks later.
Poor Soil Contact Underneath
If the sod wasn’t pressed firmly into the soil during installation — or if there are air pockets from an uneven grade — the roots have no soil to grow into. They sit in air between the sod backing and the soil surface and dry out. Rolling after installation is not optional. It’s what closes those air gaps and creates the firm soil contact that roots need to establish.
This is a reason to ask about rolling when you’re getting quotes. Some installers skip rolling to save time. On Sudbury clay, proper soil contact is especially critical because the clay surface needs the pressure to receive the sod roots properly.
Foot Traffic Too Early
Walking on new sod before it’s rooted compresses the roots against the soil and can break the establishing root connections. Even light foot traffic in the first two weeks — kids cutting across a corner, a dog running on it once — can damage sections that were otherwise establishing well.
Two weeks minimum off the new sod for people and pets. Three weeks is better. The inconvenience is worth it.
What This Means for How I Now Handle Every Installation
After the Val Caron call, I changed two things about how I close every sod installation.
First — I added a full stage-by-stage description of what the lawn will look like from day one to day 21. Not just watering instructions. A visual preview of what’s normal so that if the seam edges look brown at day ten, the homeowner isn’t panicking — they’re recognizing a normal stage they already knew was coming.
Second — I now ask the homeowner to run their irrigation while I’m still on site so I can check coverage. If there’s a gap, we fix it before I leave. This takes maybe fifteen minutes and has probably saved three or four installations from failing due to coverage issues the homeowner wouldn’t have noticed until sections were already dead.
The honest lesson from that morning in Val Caron is that a good installation is only half the job. The other half is making sure the homeowner has the information they need to get through the establishment period without panicking, skipping waterings, or making a mistake that undoes what was otherwise a perfect install.
A customer who knows what to expect doesn’t make a 7am panic call. And a lawn that gets the right care through establishment doesn’t need a callback two weeks after installation.
If Your New Sod Is Looking Off Right Now
If you’ve had sod installed recently and something looks wrong, here’s the fastest way to assess it yourself before calling anyone.
Pull test: Gently lift one corner of a section that looks stressed. If it resists firmly, roots are established and what you’re seeing is likely cosmetic. If it lifts easily, roots are not yet established — focus on consistent watering coverage.
Check the seams: If the browning is at the seam edges but the centres of each piece look okay, this is normal week-one-to-two appearance. Not a failure. Keep watering.
Check for dry soil underneath: Lift an edge in the struggling section and look at the soil directly underneath. Is it moist? Dry? If dry, you have a watering coverage problem. Check if your sprinkler is reaching that spot.
Check for air gaps: If the sod lifts with no resistance and the soil underneath looks fine, there may be an air pocket from uneven grading. Press the sod firmly back down and water immediately — sometimes this can still be saved if it’s caught early.
If you’re not sure what you’re looking at or you had someone else install the sod and things don’t look right — call me. I’d rather come out and tell you everything is normal than have you lose an installation that could have been saved.
📞 Call or text me directly: 705-507-6787
Or fill out the free quote form here and I’ll get back to you same day.
We service Garson, Val Caron, Hanmer, Lively, Chelmsford, Azilda, Capreol, and all of Greater Sudbury.
— Ryan Lingenfelter
Owner, Cutting Edge Lawn & Landscaping
Garson, Ontario
Frequently Asked Questions
Why are the edges of my new sod turning brown in Sudbury?
Brown edges at the seams between sod pieces in the first two weeks are normal and don’t mean the sod is dying. The edges of each sod roll have the least root mass and soil contact, so they dry out faster than the centres before rooting is complete. Once the roots push into the soil below — typically by day 14 to 21 — the whole piece begins pulling moisture from the ground and the brown edges usually green back up. Check your sprinkler coverage to make sure every section is being reached, especially at the seams.
How do I know if my new sod is rooting or dying in Sudbury?
Do the pull test — gently lift one corner of the sod. If it resists and doesn’t lift easily, roots are establishing and the sod is doing well even if some sections look stressed. If it lifts with no resistance at all after 10 to 14 days, the sod is not rooting — check whether that section is getting consistent water coverage and whether the soil underneath is moist. New sod that consistently lifts freely after two weeks with dry soil underneath is struggling and needs immediate attention.
What is the most common reason new sod fails in Sudbury?
Inconsistent watering in the first two weeks is the most common cause of sod failure. New sod has no established root system and depends entirely on surface moisture until roots push into the soil below. Missing even two consecutive watering sessions during a warm stretch in the first week can dry sections out past the point of recovery. The second most common cause is sprinkler coverage gaps — sections that receive little or no water because the irrigation pattern misses them by a few feet.
How long before I can walk on new sod in Sudbury?
Two weeks minimum, three weeks is better. Walking on new sod before it’s rooted compresses the establishing roots and can break root connections that were just forming. Even light foot traffic — a child cutting across a corner, a pet running on it once — can damage sections that were otherwise establishing well. The grass will look established before the roots are fully anchored, so appearance alone isn’t a reliable guide to when it’s safe to use.
When should I call my sod installer back about a problem?
Call if a section lifts with no resistance after 14 days and the soil underneath is dry — this indicates a watering coverage problem that may still be fixable. Call if large sections (not just seam edges) are going brown or yellow before day 14. Call if sections feel spongy or waterlogged — overwatering can cause root rot in new sod. Small seam edge browning and slight colour variation between pieces in the first two weeks is normal and not worth a call — it’s part of the establishment process.
Should new sod in Sudbury be watered differently on clay soil?
The twice-daily watering schedule in the first week is the same on clay soil. What changes slightly is the cycle-and-soak approach that helps on established Sudbury clay — two shorter sessions with time between them rather than one long session — which can help water penetrate rather than run off. For new sod, the priority is consistent coverage and keeping the surface moist. Once the sod is established after three to four weeks, transitioning to deep infrequent watering appropriate for Sudbury clay produces the best long-term results.
Ryan Lingenfelter is the owner of Cutting Edge Lawn & Landscaping in Garson, Ontario. Since 2020, his crew has provided full lawn care and landscaping services across Greater Sudbury — Garson, Val Caron, Hanmer, Lively, Chelmsford, Azilda, and Capreol. Licensed, insured, BBB A+ rated, and ThreeBest Rated for lawn care services in Sudbury.
📞 Phone: 705-507-6787
📍 Service Area: Greater Sudbury, Ontario
🔗 Free Quote: cuttingedgelawn.ca/quote
Related Services
Continue Reading
- Dead Lawn to Green Sod in 4 Days — How We Did It
- Sod vs Seed in Sudbury — Which One Is Right for Your Lawn?
- Sod Replacement in Sudbury — When to Replace vs When to Repair
- How Long Can Sod Survive After Delivery in Sudbury?
