By Ryan Lingenfelter · Cutting Edge Lawn & Landscaping, Garson, Ontario · June 2026
A client of mine in Greater Sudbury called me in early June with an unusual request. She’d been using our service for two seasons but wanted to hand the weekly cutting over to her son — he was twelve, old enough to handle it, and she wanted him to learn properly rather than just pointing him at the mower and hoping for the best. She asked if I’d be willing to come out and spend an hour showing him what to do.
I said yes immediately. Teaching someone to mow a lawn correctly is genuinely useful — and the correct way is not obvious. Most adults cut their lawn wrong in at least one significant way, and those mistakes get passed down to the next generation unless someone interrupts the pattern.
His name was Ethan. He was quiet at first, the way twelve-year-olds are when they’re not sure if they’re going to be good at something. By the end of the afternoon he’d mowed the full lawn, done a better job than most adults I see, and asked me two questions that told me he’d actually been paying attention.
Here’s everything I told him — the complete guide I gave a twelve-year-old in Greater Sudbury on how to mow a lawn properly.
Before you start the mower — the three things that matter most
The first thing I told Ethan was that starting the mower is the last thing you do, not the first. Before the engine runs, three things need to happen.
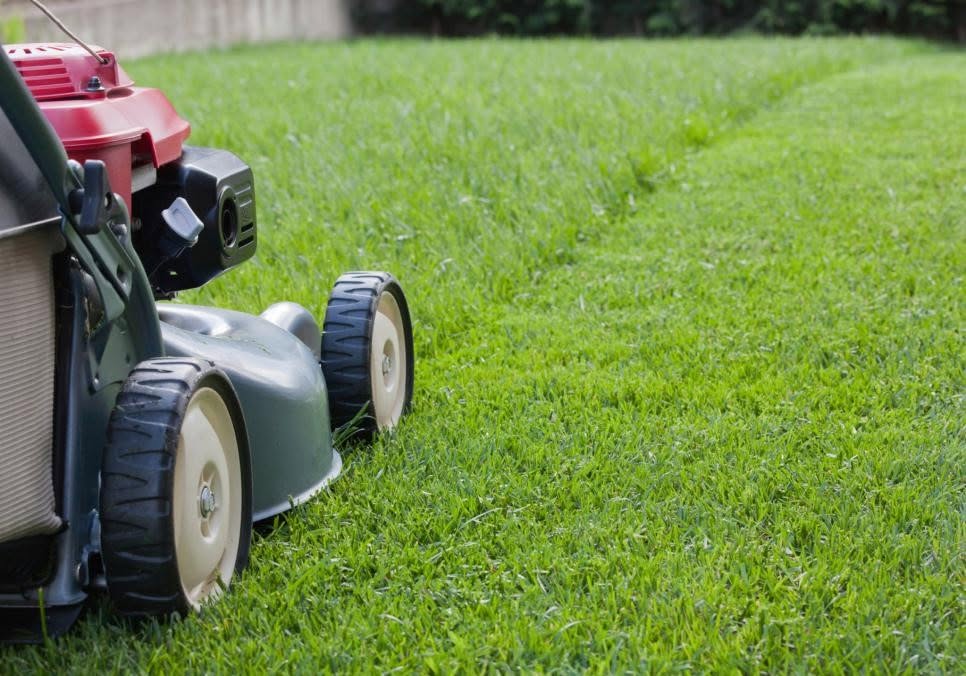
Check the deck height. The cutting height is the most important setting on the mower and most people never look at it. I showed Ethan where the deck adjustment was on his mum’s mower — a lever near the rear wheel on this particular model — and showed him what each position meant in terms of actual cutting height. We measured it together: at position two it was cutting at just under two inches. We moved it to position four, which cut at three inches.
I explained why this matters — and I gave him the version I’d give an adult, because he was clearly capable of understanding it. At two inches, the grass doesn’t have enough blade to shade the soil. The soil heats up. Moisture evaporates. The roots stay shallow because there’s no canopy protecting them. By July the lawn looks stressed and thin. At three inches, the grass shades its own root zone. The soil stays cooler. Moisture lasts longer. The lawn stays green through summer heat without fighting against itself.
I told him: never let anyone change this setting without a good reason. If a friend mows it and changes the height, change it back. This one setting determines more about how the lawn looks all summer than almost anything else. The specific damage that wrong cutting height causes over time across Sudbury is something I’ve written about in the article on the Sudbury homeowner whose lawn problem was a 10-second fix — mover deck adjustment was the entire solution after years of the wrong height.
Walk the lawn before you mow it. Pick up any toys, sticks, stones, hoses, or anything else that could become a projectile. A mower blade hitting a stone can send it thirty metres at high speed. A mower blade hitting a buried sprinkler head damages the mower and the head. This walkthrough takes two or three minutes on a standard residential lot. It’s not optional. Ethan did the walkthrough on his first attempt and found two sticks and a decorative rock near the garden border that his mum hadn’t noticed. I told him that finding those before starting the mower was more important than anything he’d do with the mower itself.
Check the grass condition before you decide to mow. Is the grass wet? If it rained in the last few hours and the grass is still damp, wait. Wet grass cuts unevenly, clumps in the discharge chute, and lies flat under the mower so the blade doesn’t cut it cleanly — you end up with a lawn that looks partly cut and partly flattened, with clumps of wet clippings sitting on the surface. Wet clippings can also mat down and smother the grass underneath. The rule: if you can shake a blade of grass and see water droplets, wait until afternoon or the next morning.
Is the grass too long — more than four and a half or five inches? One cut to three inches would remove more than a third of the blade, which shocks the plant. More than a third in one cut stresses the grass and causes that yellow-brown look for a few days after mowing. If the grass is that long, cut to four and a half inches first, then come back two or three days later and cut to three. Ethan looked at the lawn critically after I said this — it had been about ten days since the last cut. He estimated it at four inches. We agreed it was within range for a single cut to three. He was right.
The actual mowing — what to do and what not to do
Once the walkthrough was done and the deck was at three inches, I showed Ethan the mowing pattern before he started the engine.
Start with a border pass. Before doing the main lawn, mow one strip around the full perimeter of the lawn — along the fence line, along the garden beds, along the edges of the driveway. This border pass does two things: it gives you a turning space at the end of each main pass so you don’t have to reverse the mower into tight corners, and it cleans up the edges in a way that makes the finished lawn look intentional rather than rushed. Ethan asked why you do the border first rather than last. Good question. I explained that if you do the border last, you’re always walking on already-mowed grass with the mower pushing clippings onto areas you’ve already cut. Border first means your passes always discharge clippings toward unmowed grass.
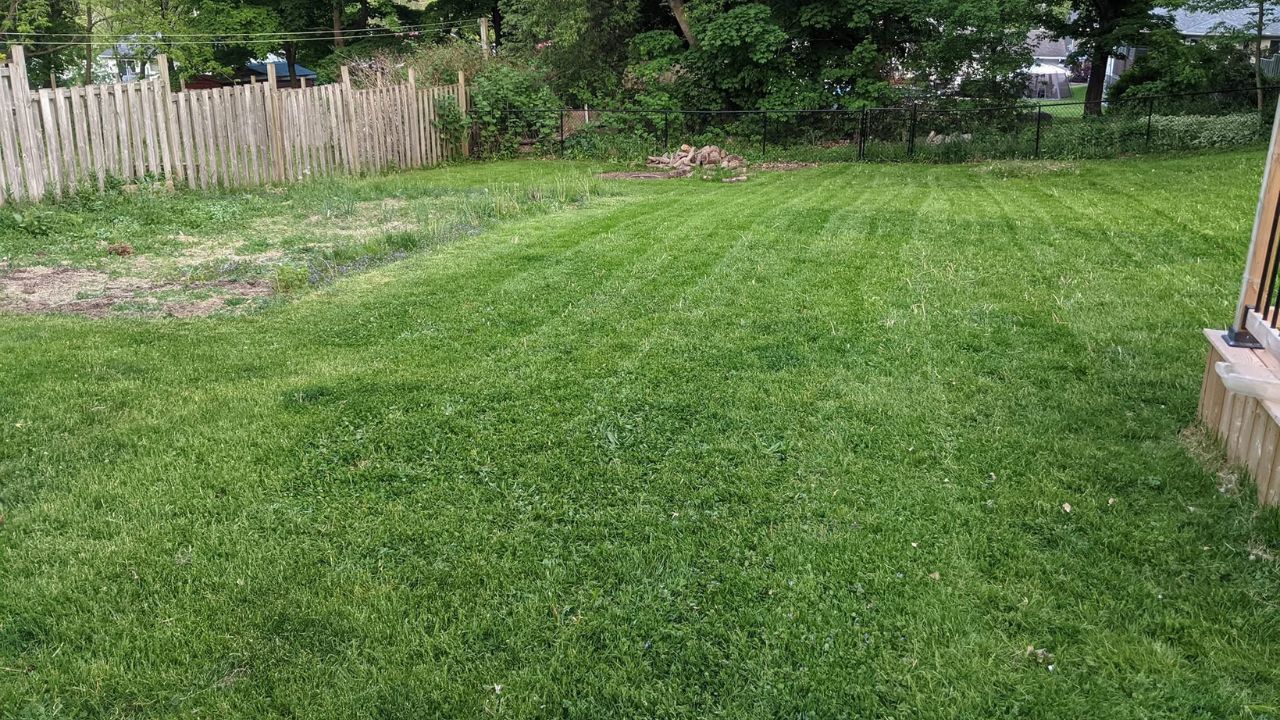
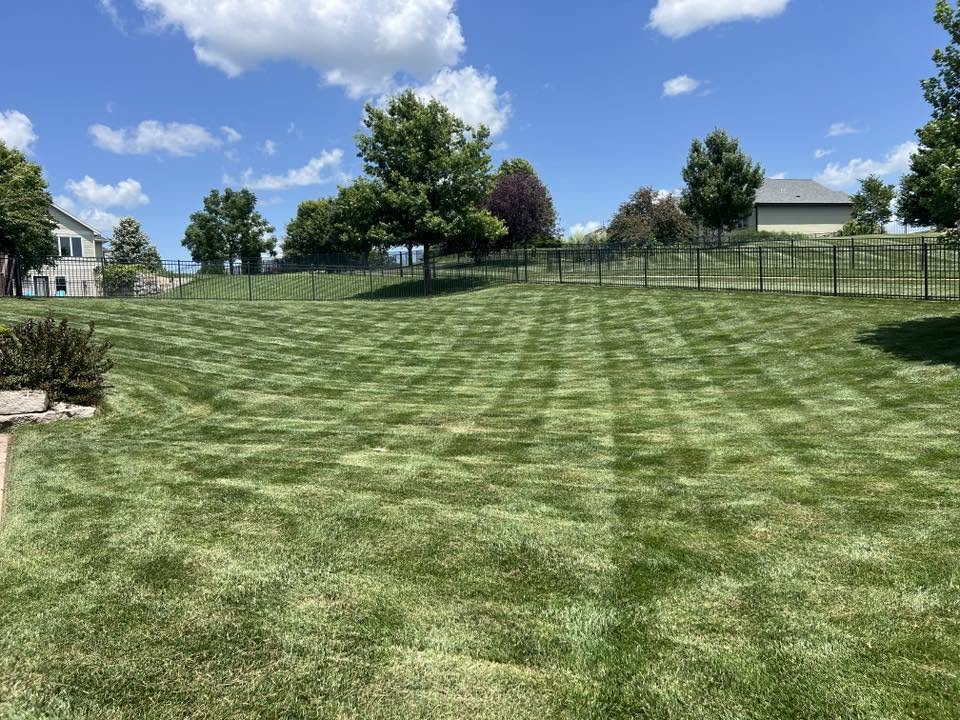
Mow in straight lines. Most people mow in whatever direction feels natural, often ending up in curved or diagonal lines that are visually uneven when you look back at the finished lawn. Straight lines parallel to the longest edge of the lawn — or parallel to the house front — produce a consistent striped pattern that reads as well-maintained even if the underlying lawn has some imperfections. Pick a fixed reference at the far end of the yard — a fence post, a garden edge, a tree — and mow toward it in a straight line rather than watching the mower itself.
Overlap each pass by about six inches. If you don’t overlap, you leave thin strips of uncut grass between passes. They’re not obvious when you’re mowing but they’re visible from an angle when the sun hits the lawn. Six inches of overlap on each pass means no missed strips and a consistent finished height across the whole surface.
Alternate the mowing direction each week. If you mow north-south this week, mow east-west next week. Alternating direction prevents the grass from leaning in one direction — grass that’s always cut from the same direction starts to grow that way — and produces an even surface that looks more professional than single-direction mowing. This is actually something most adult homeowners don’t know. Ethan filed it away immediately.
Don’t stop mid-pass on a slope. The property had a gentle slope near the back fence. I showed Ethan how to approach it — mowing across the slope rather than up and down it (safer, less risk of the mower tipping on steeper grades), and not stopping mid-pass on any slope because that’s where mowers are most likely to slip or tip if the operator loses control momentarily. Mow confidently across, not tentatively, and plan your turns at the level sections at each end of the slope.
When you’re done, check what you’ve left. Before you put the mower away, walk the lawn and look at it from a low angle — crouch down and look across the surface at the level of about knee height. You’ll see any missed strips, any areas where the cut height wasn’t consistent, any clumps of clippings. Fix them before you put the mower away, not next week. Ethan found one missed strip near the back gate on his first pass. He fixed it before I said anything. That was the moment I knew he’d actually been listening.
The things most adults get wrong that I made sure he understood
I wanted Ethan to start without the bad habits most adults have already developed. Here are the mistakes I specifically made sure to address — because if I didn’t mention them, there was a reasonable chance he’d pick them up from watching neighbours or from general advice online.
Cutting too short because it “looks neater.” This is the most common mistake in Sudbury and it’s the one I spend the most time correcting on professional assessments. Short looks neat for two days and then looks stressed and thin for the rest of the summer. Three inches looks slightly longer for the first few cuts and then looks excellent all season as the lawn responds to the correct height. I told Ethan: if anyone tells you to cut it shorter, they’re wrong. Three inches is the number. I’ve written about the cumulative damage of wrong cutting height across hundreds of Sudbury properties in the article on what I found under a Sudbury lawn maintained for ten years — a property where a decade of two-inch cuts produced results that shocked me when I checked the soil underneath.
Mowing on a fixed day regardless of what the grass looks like. Most people mow every Saturday or every Sunday because that’s when they have time. The grass grows on its own schedule. In hot dry weeks it barely grows — a seven-day cut might be every ten days. In warm wet stretches in June it can need cutting every five or six days. The rule I gave Ethan: mow when the grass reaches about four to four and a half inches, not on a fixed day of the week. Check it mid-week. If it’s still at three and a half inches, skip it. If it’s at four and a quarter, cut it. The grass tells you when, not the calendar.
Leaving clippings in clumps on the surface. A light dusting of clippings from a normal cut is fine — they return nitrogen to the lawn as they decompose. A thick layer of clumped clippings from wet grass or an overgrown lawn smothers what’s underneath. If the clippings are clumping, either the grass was too wet, too long, or the mower bag is full and needs emptying. After every cut, look at the surface. If you can still see the clippings clearly, disperse them with a rake or run the mower over the area again without cutting to break them up.
Not checking the oil and the blade condition. I told Ethan this wasn’t his responsibility yet — his mum would handle mower maintenance. But I showed him what to look for: the oil dipstick location, what the blade looked like from below the deck when it was safely tilted (with the spark plug wire disconnected), and what a dull or damaged blade looks like versus a sharp one. A dull blade tears grass rather than cutting it — the tips go brown within a day of mowing because they’re damaged rather than cleanly cut. If the lawn looks brown at the tips within twenty-four hours of mowing, the blade needs sharpening. This is worth knowing even if someone else is doing the maintenance, because it tells you whether the mower is in good condition.
Mowing in the hottest part of the day. Mowing at 2pm in July in Greater Sudbury puts physical stress on both the operator and the grass. The grass, already under heat stress in the afternoon, responds worse to being cut than it does in the morning when temperatures are lower and moisture is higher. The best time to mow in summer is morning — after the dew has dried but before the afternoon heat. In Sudbury’s climate this is typically between 9am and noon. Not 7am, because the dew may still be on the grass. Not 3pm, because the heat is at its peak.
What he asked me at the end — and what I told him
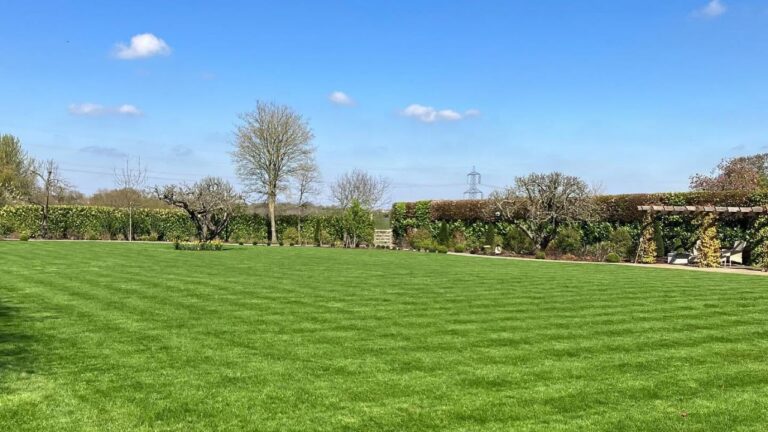
Ethan finished the lawn cleanly. Border pass first, straight parallel lines, alternating direction, overlap consistent, checked from a low angle at the end and found the one missed strip himself. His mum came out when he was finishing and was visibly pleased. Ethan looked at what he’d done with a quiet satisfaction that I recognised — it’s the same thing I see in homeowners when a property comes together after good work.
He asked me two questions as we were putting the mower away.
The first was: “Does it matter which way you turn at the end of each pass?” Yes — you should always turn in the same direction at the ends so the discharge side of the mower is pointed away from already-mowed grass as you turn. Turning the wrong way means you’re throwing clippings back onto sections you’ve already cut. It takes a moment of thinking the first few times and then becomes automatic.
The second question was the one that stuck with me. He asked: “How do you know when a lawn is actually healthy, not just cut?”
I thought about that for a moment. Then I told him: a healthy lawn springs back when you press your hand into it. It’s a consistent colour — not just green in some spots and pale in others. It has some resistance when you pull a handful of blades — the roots are holding. And when you walk across it in summer heat, it feels slightly cool rather than hot, because the grass is shading the soil underneath it.
He looked at the lawn he’d just finished. He crouched down, pressed his hand into it, and checked the colour across the different sections. Then he stood up and said: “It’s pretty good.”
He was right. It was pretty good. His mum’s lawn had been properly maintained before he took it over — annual aeration in May, correct seed blend for this part of Sudbury, the watering approach we’d established in our first season working with her. He was inheriting a lawn in good condition and now had the knowledge to keep it that way. What makes a lawn reach that condition in the first place — the spring preparation, the seasonal approach, the things that compound over years — is covered in the article on the Val Caron homeowner who asked what I’d do with his lawn over twenty years. Ethan is twelve. He has decades ahead of him to build something genuinely excellent if he starts right.
If you want someone to show a young person in your household how to mow a lawn properly — or if you want a refresher on any of this yourself — give me a call. The fundamentals aren’t complicated. They’re just not obvious unless someone who’s been doing it for a while takes the time to explain them clearly.
📞 705-507-6787 | Get a free quote online
— Ryan Lingenfelter
Owner, Cutting Edge Lawn & Landscaping
Garson, Ontario · 705-507-6787